In this section of our documentation, we'll cover how to customize your location profile as well as how to configure hours of availability for your staff at a Location. Click on the links on the upper right of this page to learn more about any of these these topics.
Services and classes in TimeTap represent the reason for the appointments. While both services and classes can be found, added, and edited on the same page your TimeTap account, they function quite differently.
Services are 1-on-1 appointments between a staff person and the client. Clients can schedule a service appointment for any time during which you (the staff) have hours of availability set up. The appointment times offered for a service are based on the duration you assign to the service. Thus, if a service is set for a duration of 1 hour, then your availability will display to clients booking in 1 hour appointment time slot increments on the Client Scheduler.
Classes are group appointments where 1 staff person leads the appointment and several clients attend. Classes are offered whenever a staff person chooses to schedule class sessions. Each class session has a max capacity which determines how many clients can book into the class.
Your full services & classes list will be available under Settings > Services & Classes -
When your clients are booking with you, they will see the service or class as the reason for the appointment. In this specific documentation page, we'll go through all of the different places where your clients will see the service or class name so that you can make sure it is showing up in a sensible way for each of them.
These include the following -
- Services Panel on Client Scheduler
- Appointment Confirmation Panel
- Appointment Emails
-
Appointment Details Page
Services Panel on Client Scheduler
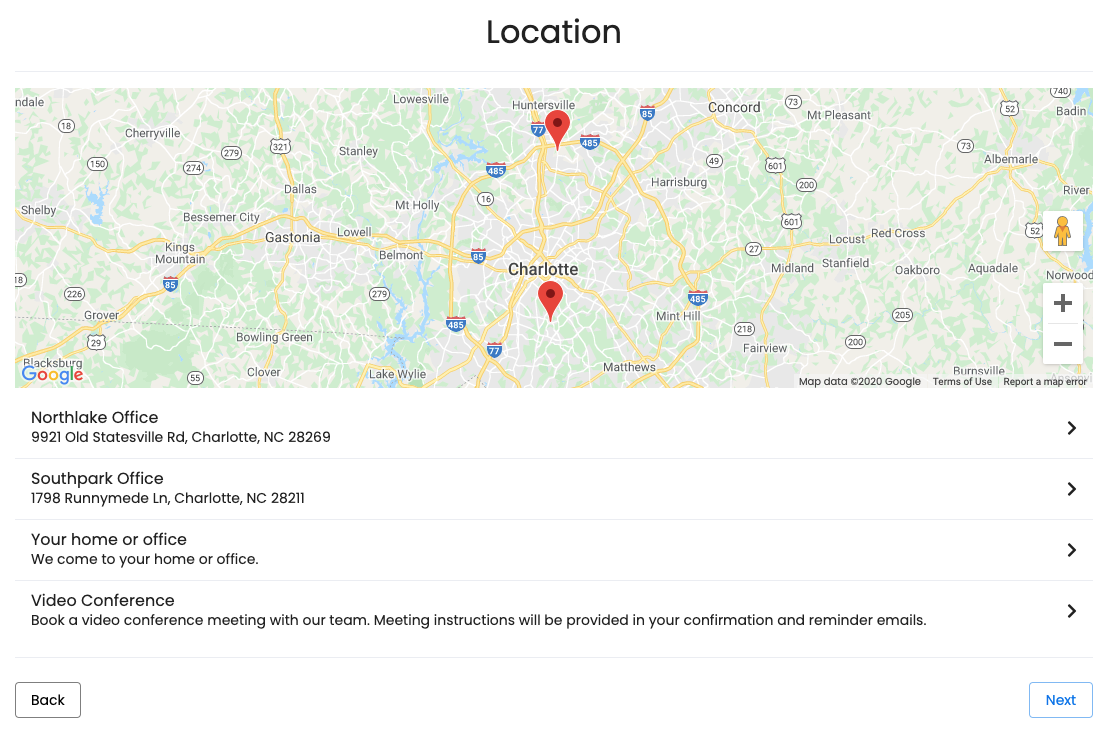
If you have upgraded to a TimeTap Team subscription, then you have the ability to add multiple locations to your account. As soon as you add multiple locations, you can also customize the Client Scheduler's panel flow so that clients can select which location they want to schedule an appointment at as they are booking.
No matter if you meet with clients in person or over the phone, you will likely want to provide some detail around where the meeting is going to take place. It may be that you want to make sure your Skype Username is conveyed clearly to the client, or it may be that you want to make sure that you client has instructions on how to enter your building. It also may be that you plan on calling the client on the phone at the start time of the appointment and thus you don't really want the location to show up at all.
Whatever your rationale, knowing where clients will see your location information in the booking process is the first step toward making sure everything is communicated clearly.
What is displayed on this page of the scheduling flow is the location name as well as the location address (for office locations) or location description (for virtual locations). You can edit these 2 fields (the Address field for physical locations and the Description field for virtual locations) from your location's profile and they will update what gets displayed on your scheduler.
The only locations that will show up on this page are locations that either have service availability set up for a certain staff or have a class schedule set for them. If you do not see a location on this page, it is because no classes are being offered there and no staff have hours set up at the location to offer services, so clients can't book any appointments there.
Appointment Confirmation Panel
Once a client has finished booking an appointment, they are presented with a brief confirmation summary of their appointment details. The summary for the appointment location on this page by default reads "Location: %LOCATION_NAME%".
You can find where you can edit this confirmation summary/appointment success message under Settings > Final Confirmation -
You can learn more about editing this success message specifically by reading our documentation on the Final Confirmation message here. You can also learn about how to use all those percentage sign names (called email tags) by reading our documentation on our email tags here.
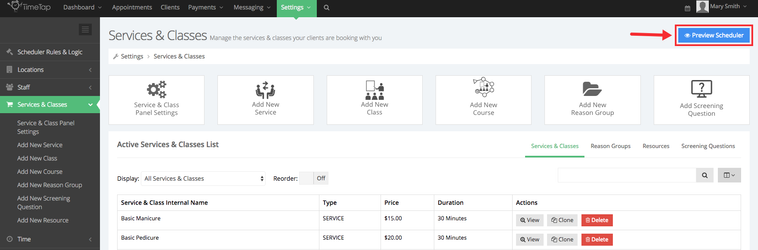
This will launch your mini website on a new tab where you can click through your scheduler and check out your "Services/Classes" and/or "Time" panel to make sure that your appointment offerings and available time slots look correct for your different services and classes.
Appointment Detail Page