On this page we're going to cover how to create a substatus of the appointment status and apply it to a messaging trigger.
- Automated Messaging Triggers is a feature that allows you to send custom messages to clients or staff notifying them if there have been any changes, updates or other important information regarding the appointments or classes they're booked for.
- Substatuses allow you to give your appointments custom statuses that match your business' jargon. Let’s say your business offers appointments at a client’s home, and for this example this business will be a cleaning service. If for whatever reason when your staff member shows up to clean a client’s home and the appointment does not happen, we can use these substatuses to further explain the situation for our records. For instance, we can create a substatus of the No Show status that clarifies that the client was Not Home, or we can create a substatus of Cancelled that clarifies that there was a Client Conflict.
In the following example we'll assume I travel to my client's offices to provide my notary services, and there may be times when I'm running late due to traffic. If I want TimeTap to send my clients a text message when I mark my appointments as "Running Late", I'll need to do the following -
- Create a Substatus of the Open Status
- Create a Trigger Template
- Create an Automated Messaging Trigger
While on the Configurations page I'll need to scroll down until I see the “Account Level Calendar and Appointment View Defaults” section and then scroll down a bit more until I locate the Open Appointment Substatuses field -
In the Open Appointment Substatuses field I'll need to click on the + button to add a new substatus to the Open status -
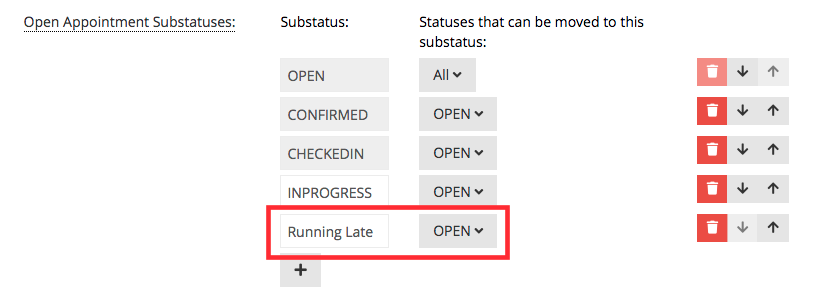
Enter "Running Late" in the field that appears under the Substatus column, and in the 'Statuses that can be moved to this substatus' column only leave Open selected. This means that only when the appointment is an an Open status will you be able to assign the Running Late substatus -
Click on the green Save button in the Account Level Calendar and Appointment View Defaults section to save your new substatus -
I'll begin by navigating to Messaging > Appointment Templates and locating the 2 templates labeled Appointment Triggers and Appointment Text Message Triggers -
The Appointment Triggers category will allow you to create an email template and the Appointment Text Message Triggers category will allow you to create a text message template. For this example, I want clients to receive a text message when an appointment is marked as "Running Late", as they would be more likely to check their cell phones for notifications than their email inbox. To do this I'll need to click on the View button next to Appointment Text Message Triggers -
In the Templates in Category screen I can choose to view the default template and edit it, or I can clone it and create a template specifically for my "Running Late" automated messaging trigger. in this case I'll click on the Clone button to create a template just for my "Running Late" messaging trigger -
On the Template Profile page I'll add a name for this template and click on the green Save button -
I will then click on the blue Edit button under the Template section to add the message to my template -
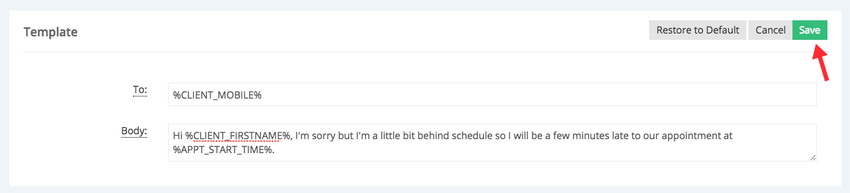
And then I'll add a short message in the Body field and click on the green Save button -
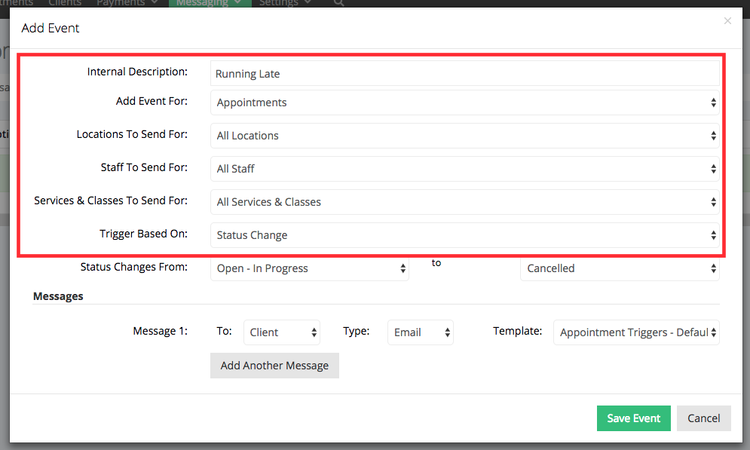
A new window will appear where you can fill out the following fields -
- Internal Description - Give the messaging trigger an internal label.
- Add Event For - Determine the type of event that will trigger the message to get sent - includes Appointments, Class Sessions, Disclaimer Forms and Invoices as choices.
- Locations To Send For - Select which appointment locations, if not all, will be included for this messaging trigger.
- Staff To Send For - Select which appointment staff, if not all, will be included for this messaging trigger.
- Services & Classes to Send For - Select which services & classes, if not all, will be included for this messaging trigger.
- Trigger Based On - Determine which action that will initial the triggered message to send - includes the following choices -
- Time - Months, weeks, days, hours and minutes before/after the appointment.
- Status Change - From Open to Completed, Open to Canceled, Pending Payment to Open, etc.
- On Creation - When a service or class gets created, the triggered message will be automatically sent out to the clients/staff.
For this example, I'm going to name my automated messaging trigger "Running Late", I'm going to assign this event to appointments and I'll send it for all locations, all staff and all services & classes. I will also set the automated trigger to be based on Status Change -
For the 'Status Changes From' dropdown I'll select Open and in the 'to' dropdown I'll select Open - Running Late -
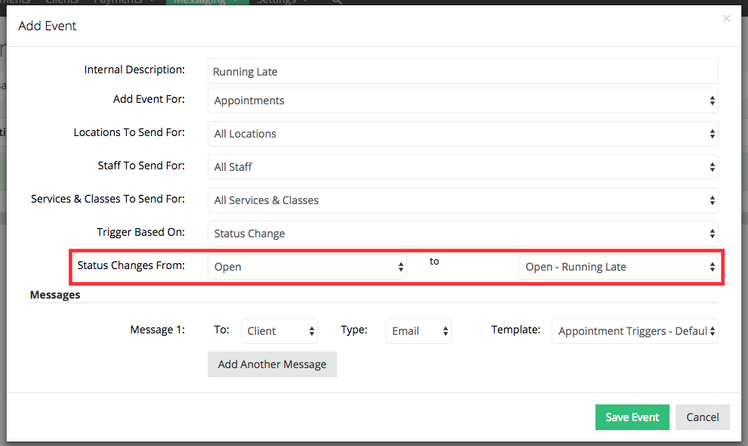
You will be able to select any status and substatus combination if you want to add a different messagingtrigger based on status change.
Under Messages you'll have the following fields to define -
- To - This is who the trigger message will be sent to. In this field you will choose either Client or Staff
- Type - You have the choice to send an email or a text message to your clients or staff
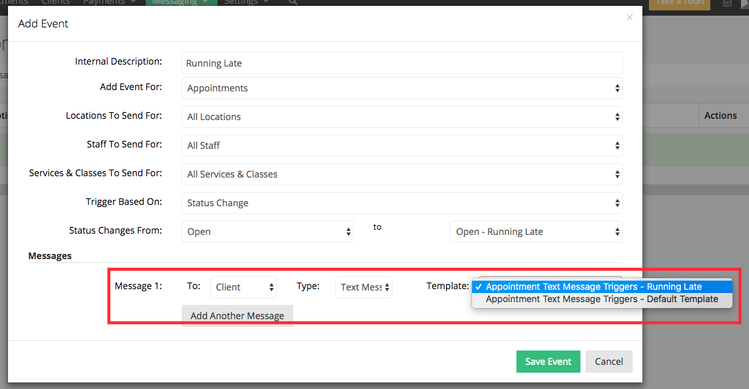
- Template: Here you will choose from the templates you created in the appointment templates. As you can see we have listed out some examples to show the selection process
- Add Another Message: Click this button to add another message where you will have the same fields to choose from. If your first message is sent to the client via email and now you want to sent another message to client via text OR if you want to send a message to staff as well you can set up multiple messages within the Trigger
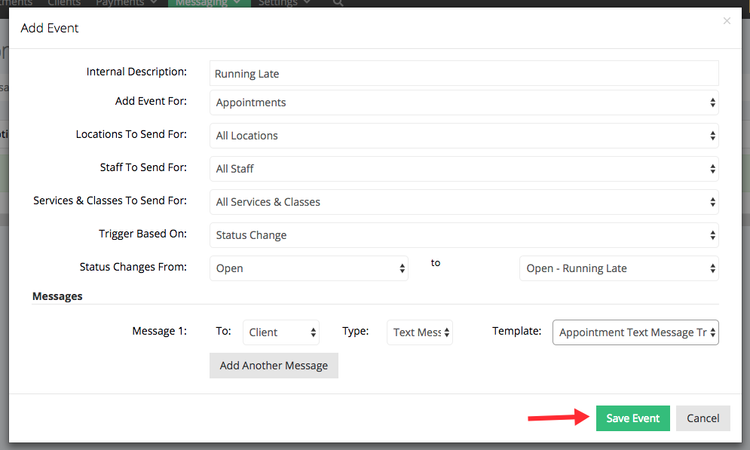
- Save Event: Once you have finished setting the properties of the Trigger you will then press Save Event to put it into motion
- Cancel: If you decide you no longer want to set up this trigger click cancel to exit the process
I'm going to choose to send the message to the client, text message type and the Running Late template I created earlier:
After all the necessary selections are made click the Save Event button:
After the event is listed it will be added to your list of automated triggers, you'll also have the option to edit it or delete it by clicking the correspond button under the Actions column:

The appointment in the image below is currently set to Open, I'm going to change the status to substatus Running Late so TimeTap can send the client a text message letting him know that I'm running behind schedule:
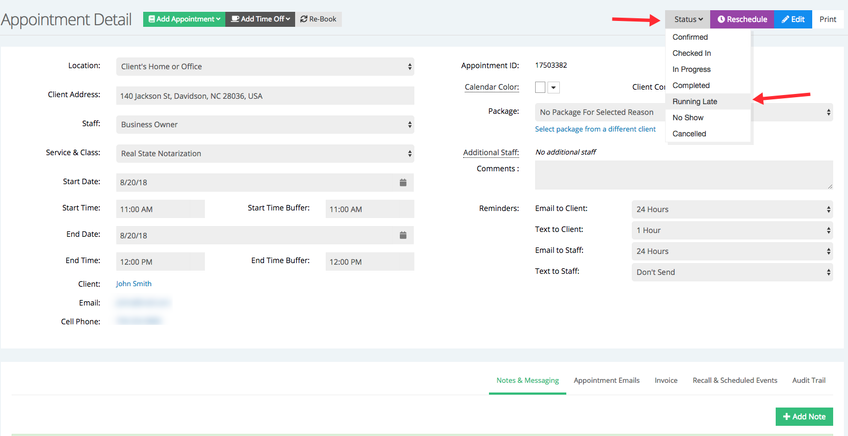
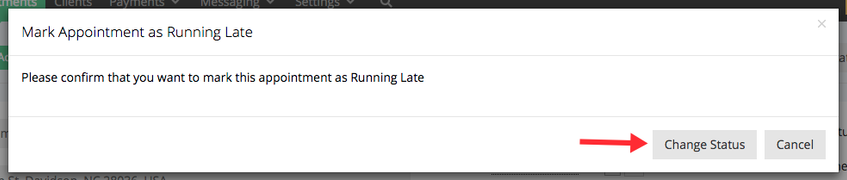
I'm then going to confirm the substatus change to trigger the automated message:
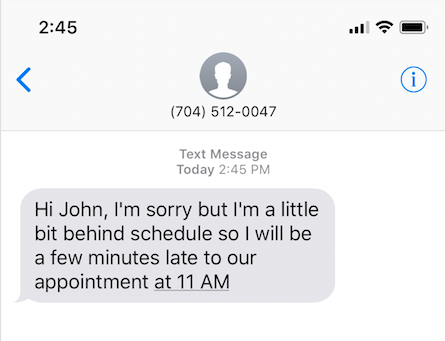
After the automated trigger is activated the template chosen will be sent to the client: