When change a class sessions status from "Open" to "Closed", it essentially means that clients can no longer book into the class session themselves through your client-facing scheduler. Public enrollment is "closed"; the only way clients can enroll in a closed class session is to talk with you or your staff directly and they can add them to the class attendees list.
This is much different than changing a class session's status from "Open" to "Cancelled" as a "Cancelled" class session essentially means that it isn't happening at all any more for your business. Whereas with a "Closed" class session, it's definitely still happening and all clients are still on the attendees list, it just isn't open for public enrollment anymore.
This help doc covers:
- How Class Sessions Close Automatically
- Manually Closing a Session from the Class Session Details Page
- Manually Closing a Session from the Class Lists View
Only class sessions that are currently in an Open status can be moved to Closed. Any class session in a Cancelled status would need to be re-opened first in order to be moved to Closed.
This happens as soon as the "Latest Class" time setting is passed. You'll find your Latest Class setting under Settings → Time → Class Time Display. Essentially, the latest class setting determines the cut off point for when enrollment closes on a class.
It works like this: let's say you have a class session starting at 3:00pm on Friday, July 17th, 2015. If your latest class setting is set to "1 hour" then the session would move from Open to Closed at 2:00pm on Friday, July 17th, 2015.
If a class session was closed automatically and you didn't want it to be, you can always re-open the class session to allow clients to continue to book up until the start time of the session.
To do this, I can go to my Appointments → Calendar view and click on the class session I want to close:
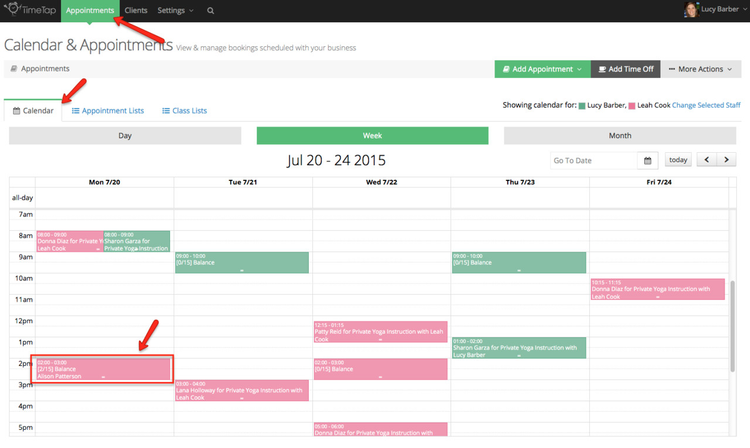
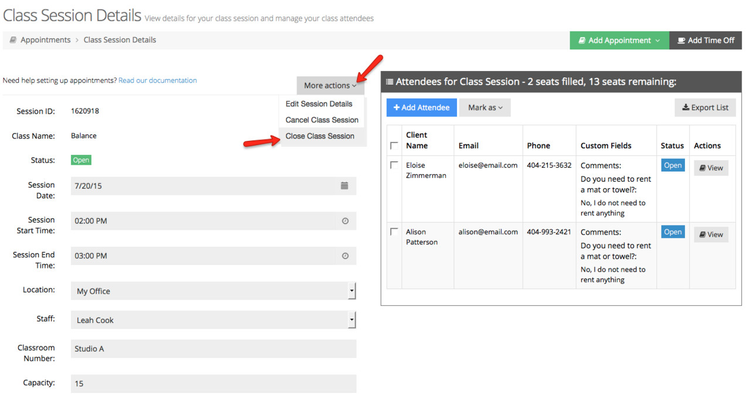
Clicking on the class session I want to close from the Calendar view will take me to the Class Session Details screen. On this screen, find the "More Actions" dropdown and click the option to "Close Class Session":
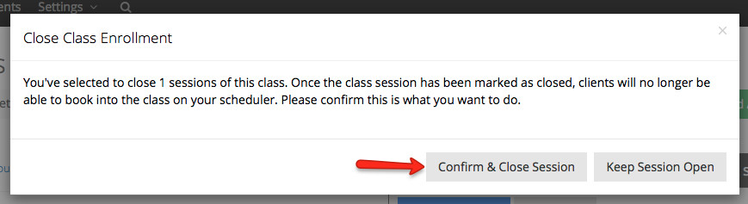
This will bring up a small confirmation window where you can confirm that you do wish to close public enrollment:
After confirming that you do want to close the session enrollment, you'll see the class session details screen update with a new session status of "Closed":
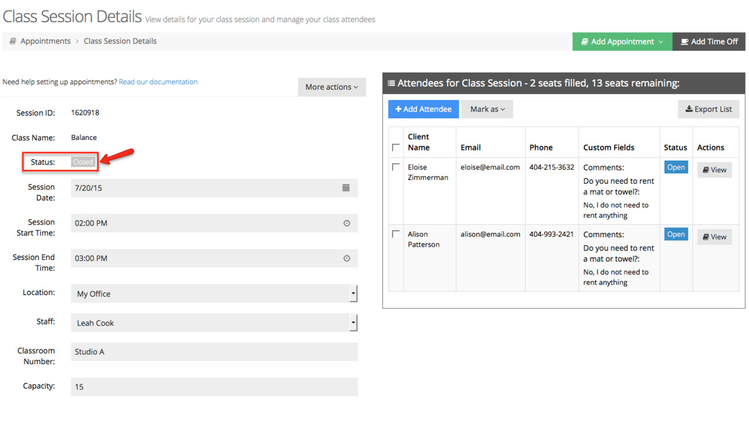
You'll still be able to "Add Attendees" from the class session details screen, although you won't be able to see it as an option for booking from your client facing scheduler or if you click the "Add Appointment" button from the back office of TimeTap.
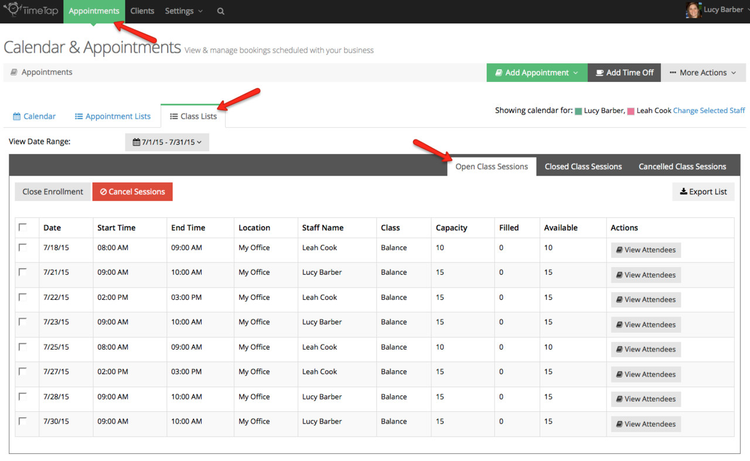
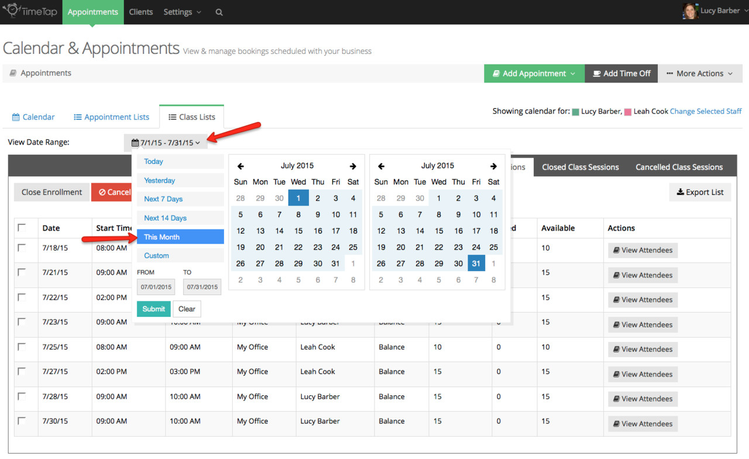
First, make sure your date range covers the dates of the sessions you wish to close:
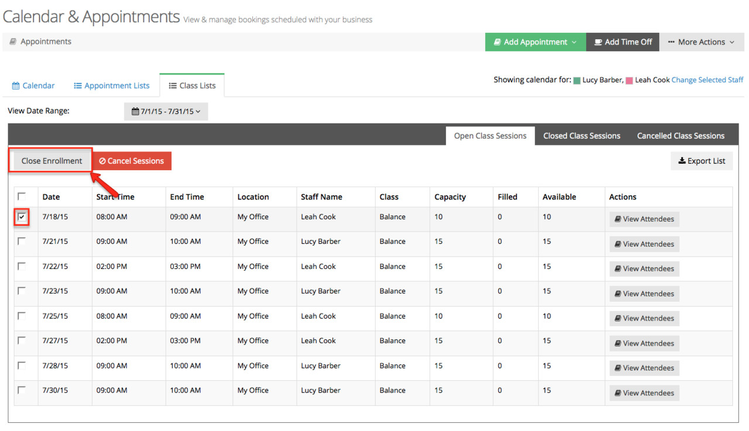
Next, check the checkboxes to the left of the class sessions you wish to close and click the "Close Enrollment" button at the top of the Open Class Sessions list:
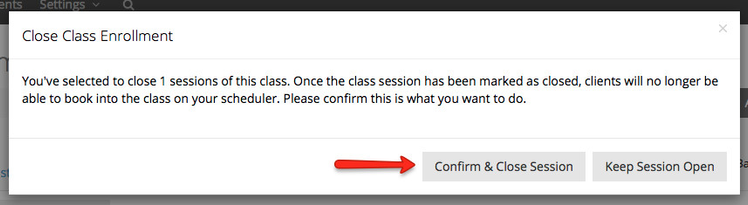
You will get a small confirmation window to confirm that you really do want to close public enrollment for the class:
Once you confirm from that window that you really do want to close the class, you will be directed to the "Closed Class Sessions" list where you will see the class session you recently closed:
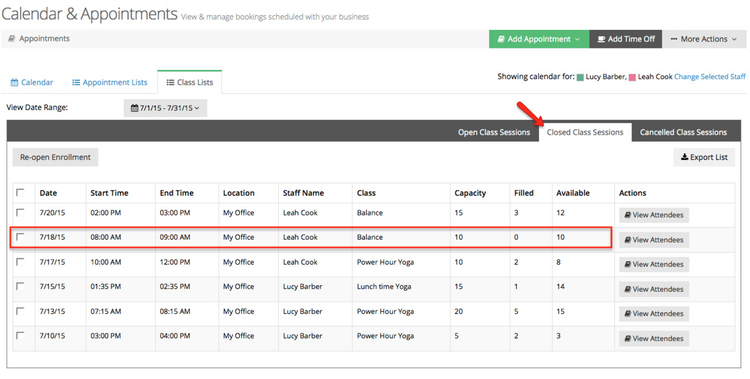
From here, you can click the "View Attendees" button next to the closed class session to enter into the closed class session detail screen. From the Class Session Detail screen for the closed session, you can add a new attendee to the session. This is great if the session is closed but you have a few walk ins that you want to record on the class roster.