A class session is always created with some pretty standard details: date, start time, end time, location, staff, and capacity. You can always go back in and update any of these fields if last minute changes come up.
This help doc covers:
- How to edit when the class session will take place
- How to increase the class session's capacity
- How to hide additional guests option
All of these items can be easily adjusted from the Class Session Detail page. You open this page by going to Appointments → Class Lists → Open Sessions and using the Date Range dropdown to customize the date range to cover the dates in which the class session you want to edit falls.
Once you find the session you want to edit, click the View Attendees button to the right of that option:
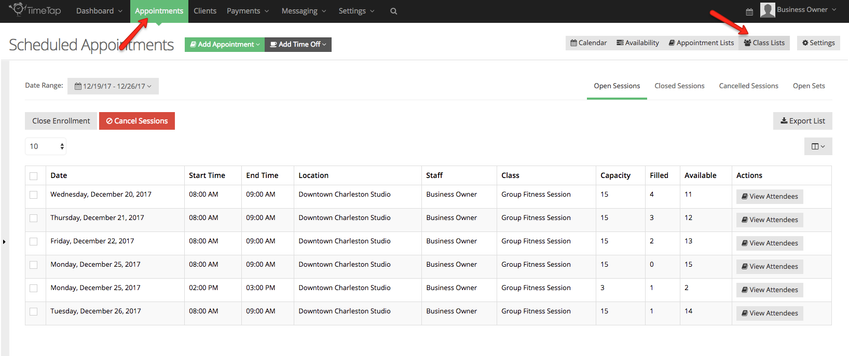
This will take you to the Class Session Details page for that particular session.
Change the Session Time
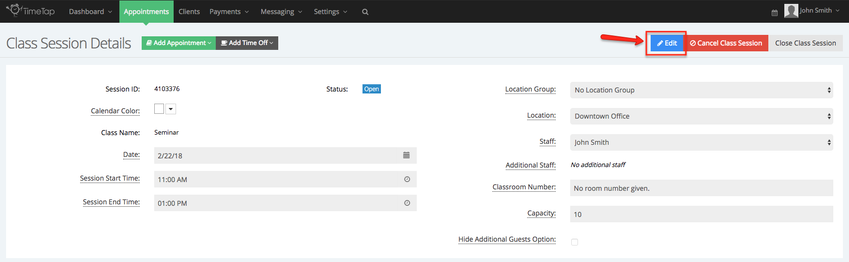
To make changes to this session, click the Edit button:
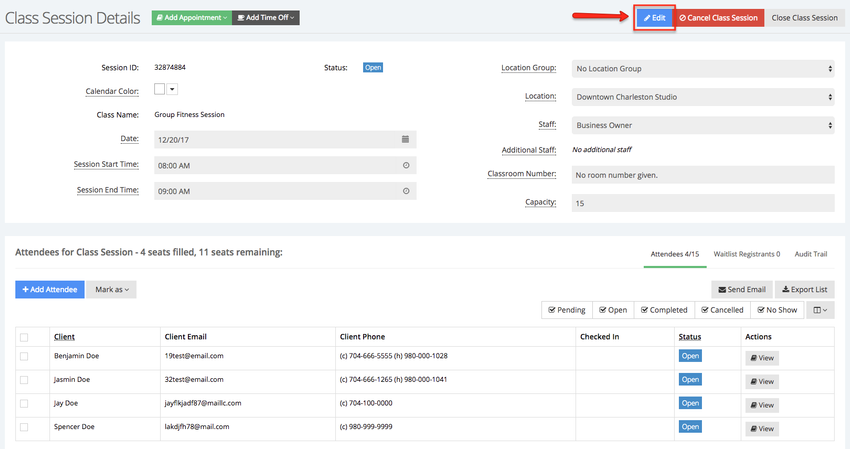
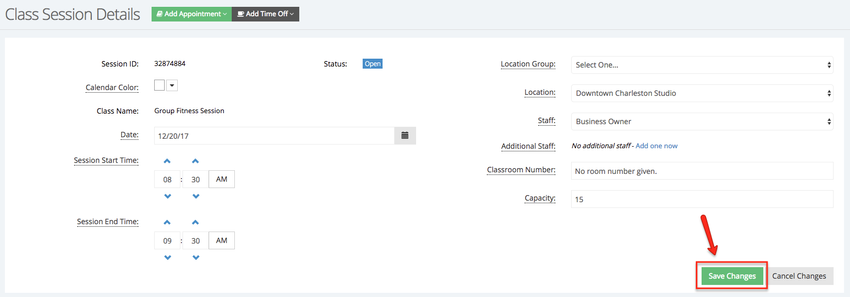
Clicking this will switch the page to Edit Mode, where you can make any of the adjustments you need to and it will update for all registered attendees in the class.
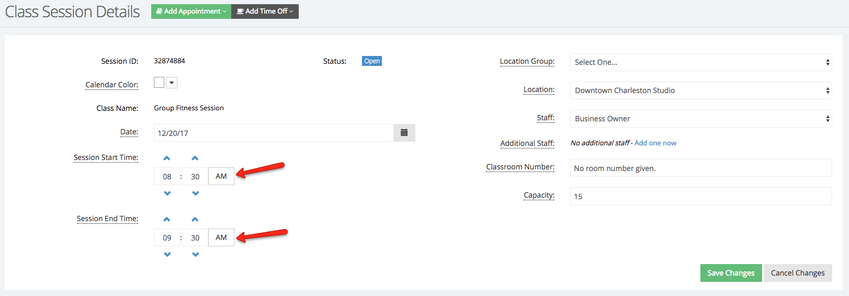
For instance, if I needed to change the above class session so that it started at 8:30 am instead of 8:00 am, I can simply change the Session Start Time. By changing the Session Start Time, the end time will automatically update based on the duration of the class.
Let's say, however, if I go to edit an appointment and as I’m making the changes, I realize that I’m editing the wrong appointment, I can discard the changes using the Cancel Edits button that is displayed while editing.
The Cancel Edits button will revert the appointment back to its previous state and exit Edit Mode.
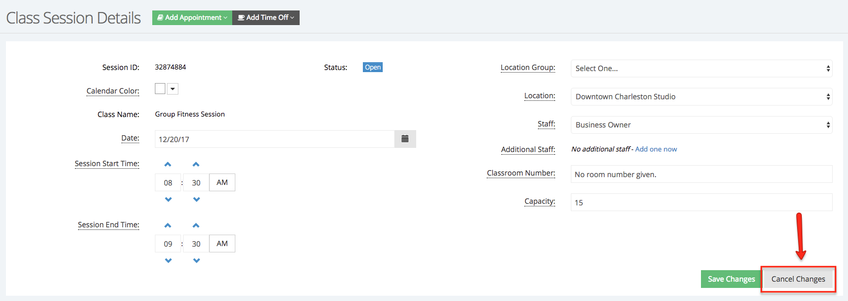
To confirm the current changes instead, select Save Changes.
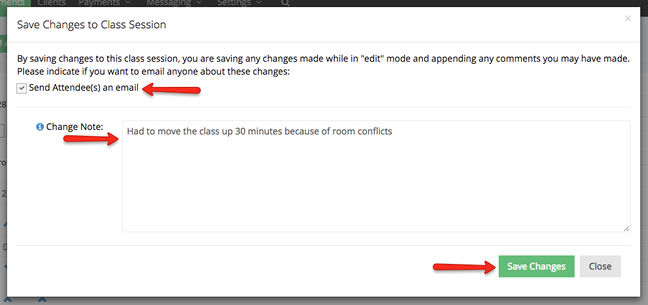
A pop up will appear providing me the option of sending the attendees an email to notify them of the change.
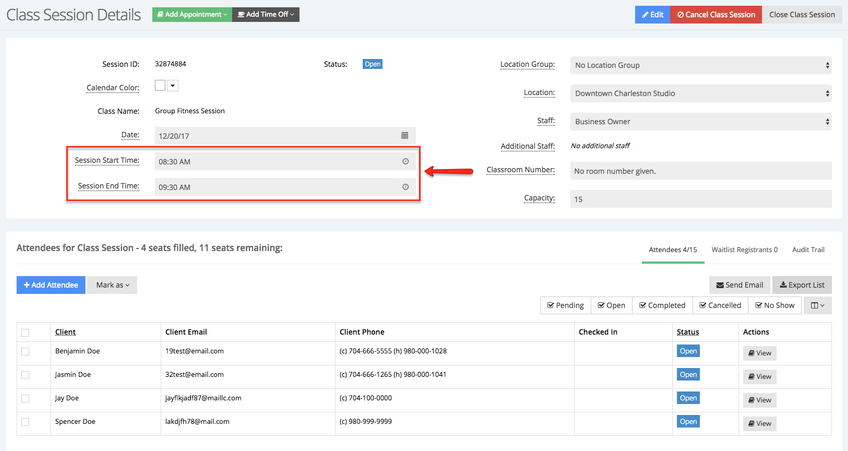
Once I press Save Changes on the send email window, the email will go out to all registered session attendees and the class session details screen will go back to view only mode with the new time saved:
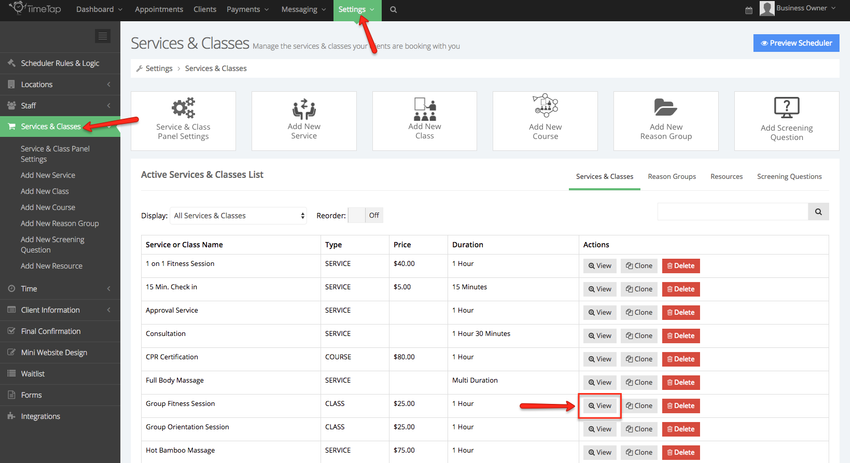
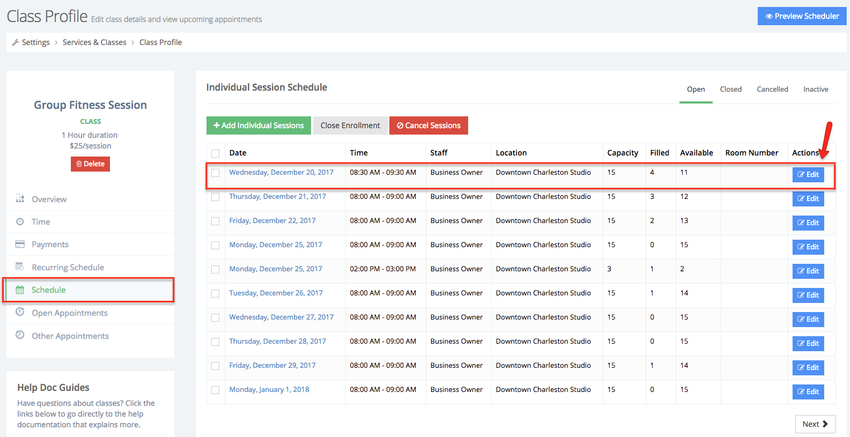
Once in the class profile go to the class's Schedule view. Here you will all open class sessions, click the date of the class session (hyperlinked in blue) to go to that class session's attendees' list screen or click the Edit button to make quick changes to the Date, Start & End Times, Location, Staff, Classroom number, and capacity. For this example we will click the Edit button:
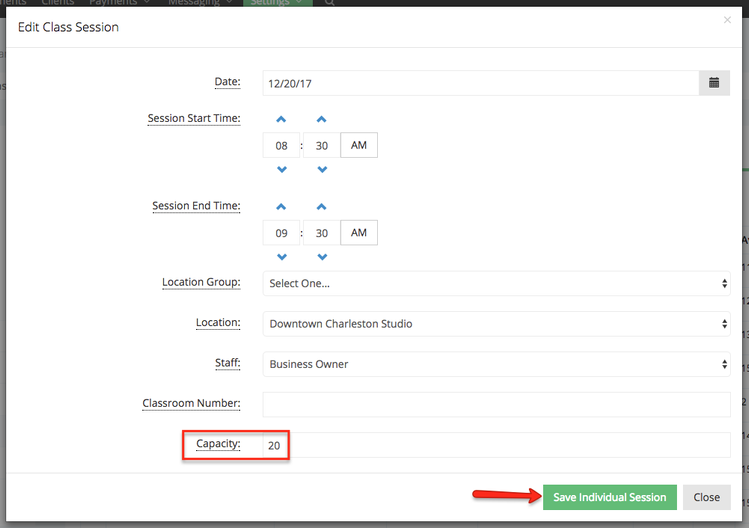
Once the button has been clicked, a new window will appear. We will increase the number of allowed attendees (capacity) and click Save Individual Session:
Once the class session is in Edit mode check the box next to "Hide Additional Guests Option" and click Save:
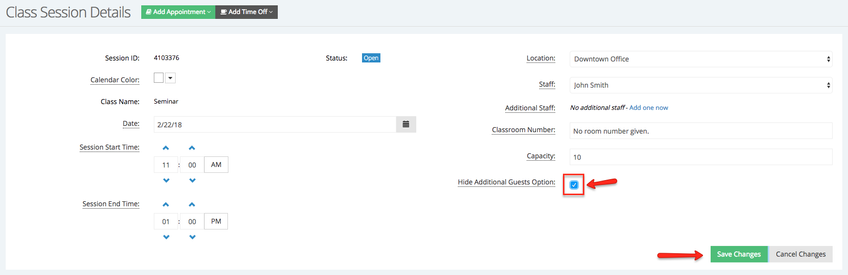
Once the changes have been saved the option add additional guests will not be present in the Client Information panel within the scheduler.