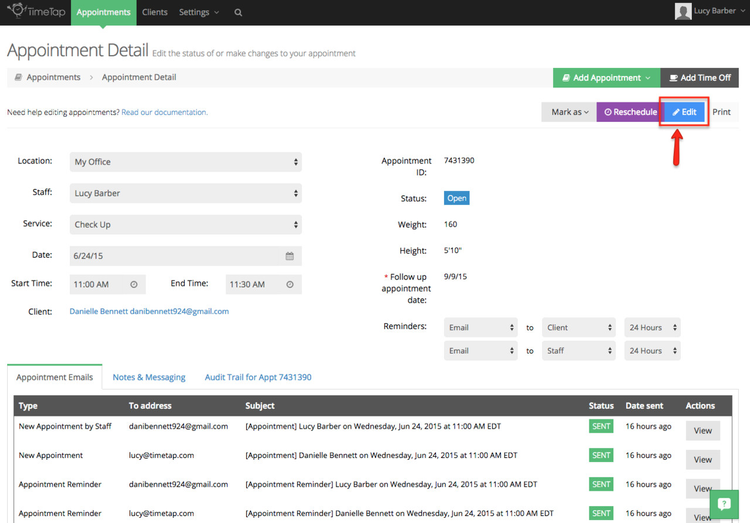
If you navigate to an appointment detail screen, you'll notice along the top there is a blue "Edit" button. By clicking edit, you'll turn the disabled fields (like staff, service, date, time, client, and any appointment custom fields) into editable fields that you can change.
Unlike going through the rescheduling workflow, editing an appointment will let you adjust the date and time so that it can overlap with other appointments you have on your calendar. If you want to edit an appointment but make sure it doesn't overlap with another appointment, I would recommend checking our our documentation on how to reschedule appointments. If you either know that you won't be double booking someone else, or circumstances require that you double up on your schedule, then the Edit button is the way to go.
This help doc covers:
Each of these sections also includes a quick look at how those changes display on the Audit Trail for the appointment.
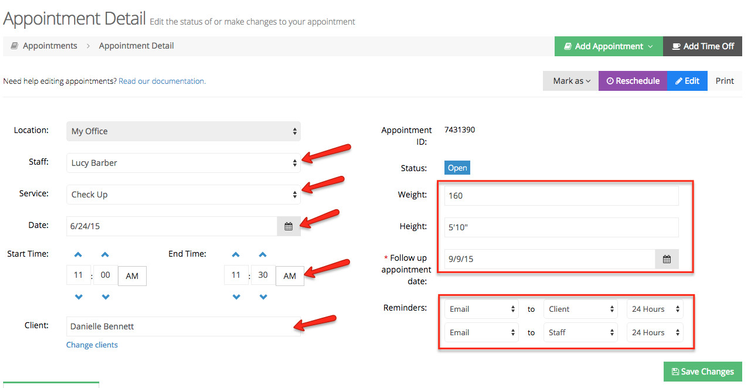
While editing the Appointment Detail page, you can update:
- staff
- service
- date
- time
- client
- any of the custom Appointment Detail fields
- appointment reminder times
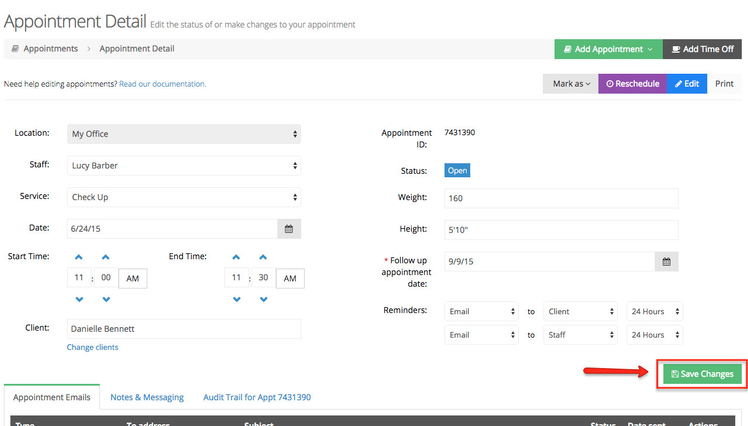
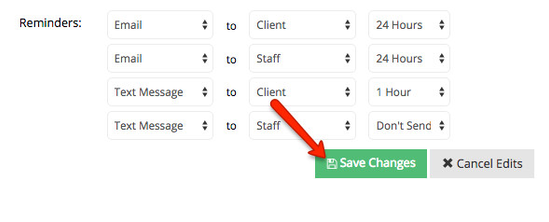
You'll notice when the appointment detail screen is in Edit mode that a "Save Changes" button appears in the bottom right. After you make any changes to any of the fields on the appointment, make sure to click that button to commit the changes you made:
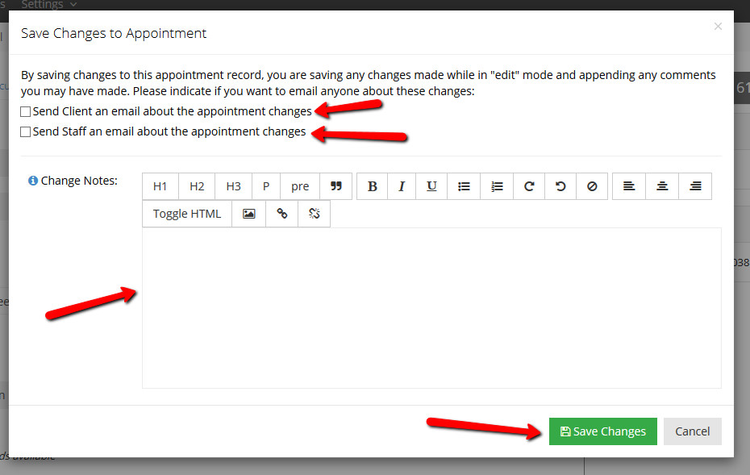
Once you click the "Save Changes" button, you'll be prompted on whether you want to send out an email to either the client and/or the staff about the changes that were made. A summary will be inserted into the email to let the client know the specifics of what changed, but you can also type in a custom note that will be entered into the default email template.
To do this, simply navigate to the appointment detail screen for the booking you wish to shift the date for and click the blue "Edit" button in the top right:
After clicking the "Edit" button, you'll see the disabled fields on the screen which can be changed become editable:
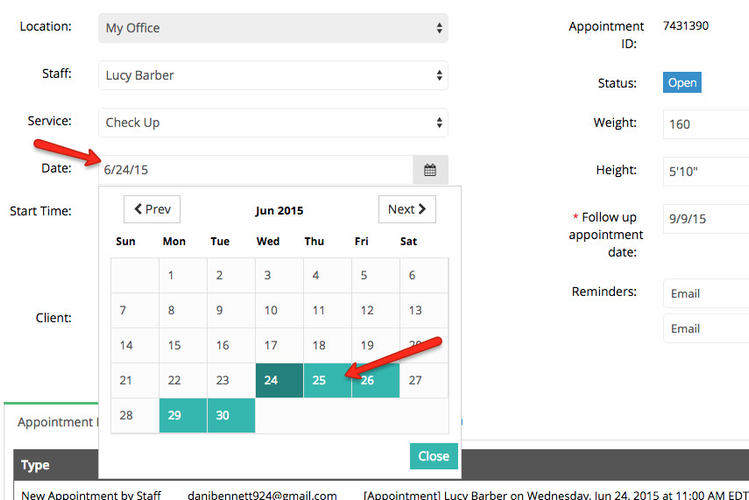
To swap the date from here, simply click on the date field and select the new day you want to move the appointment to from the calendar dropdown:
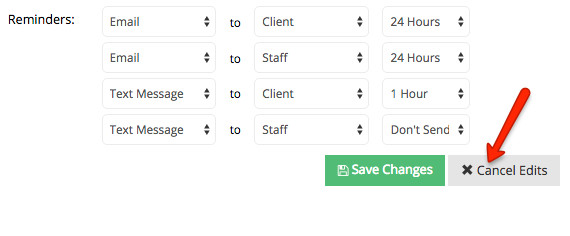
Let's say, however, you're editing an appointment and making the changes in Edit Mode, but realize that you're editing the wrong appointment. You can easily roll back the changes. While in Edit Mode, there is a button next to the “Save Changes” button at the bottom right-hand side of the screen called “Cancel Edits.” If, at any point in editing an appointment, you decide to discard your changes, you can press the “Cancel Edits” button to revert the appointment back to its previous state and exit Edit Mode.
If you are satisfied with your changes, you can press "Save Changes":
Pressing the "Save Changes" button will bring up the prompt window to make sure that you really wish to save, select whether you want to send an email to either the client and/or the staff about the change, and enter in any change notes to go in the email that is sent out to them. Once you've selected the email recipients and entered in any change notes, press the "Save Changes" button from that window to commit the new date to the appointment:
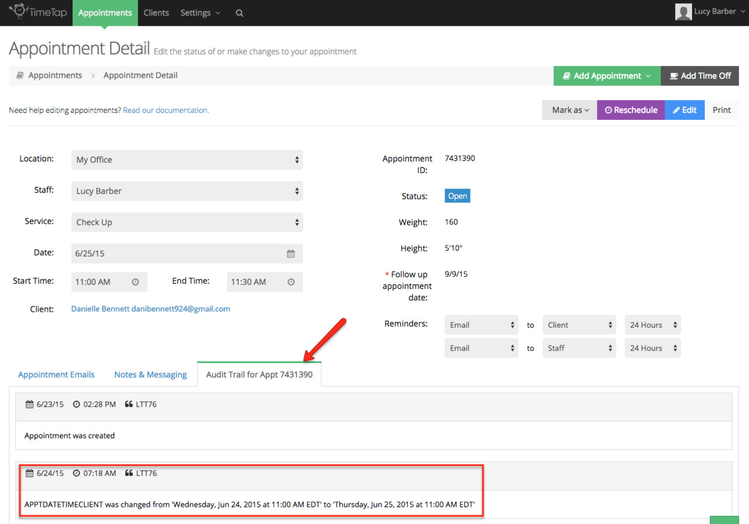
After you press "Save Changes" the audit trail will update with a time and date stamp for the change you just made as well as the username of the staff person who made the change (it would be "Webclient" if the client went in and rescheduled him/herself  )
)
You'll also notice, if you elected to send out the appointment changed email, that the email is listed under the "Appointment Emails" tab along with when it was sent out and an option to view the body of the email that was delivered:
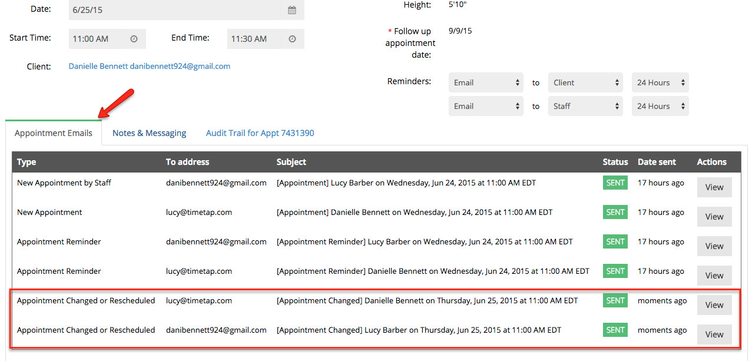
Now that you are done changing the date to this appointment, if it is in Open status you will see that new appointment show up on the calendar view and in your open appointments list.
To do this, simply navigate to the appointment detail screen for the booking you wish to shift the time for and click the blue "Edit" button in the top right:
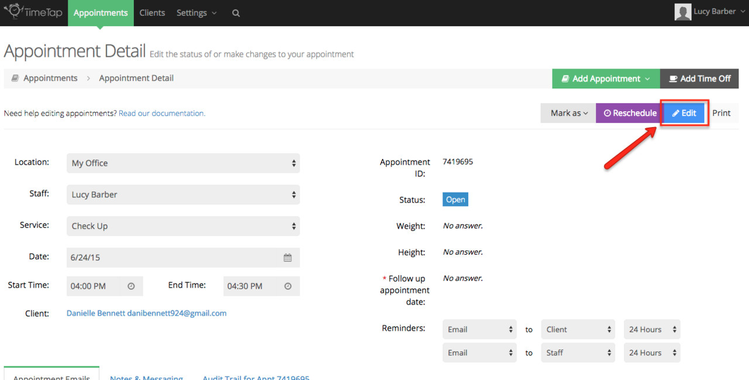
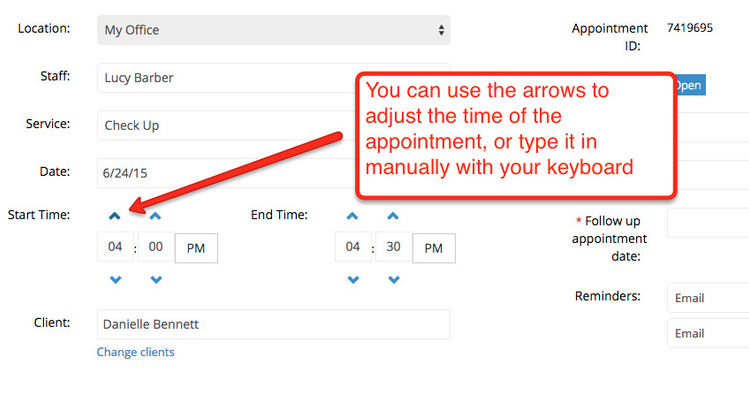
After clicking the "Edit" button, you'll see the disabled fields on the screen which can be changed become editable. If you want to change the time for the appointment, you can use the up or down arrows around the start time to change the hour and minute that the appointment starts. The end time will update automatically based on the duration you have set for the selected service:
After entering in the new time, press "Save Changes" at the bottom of the appointment screen:
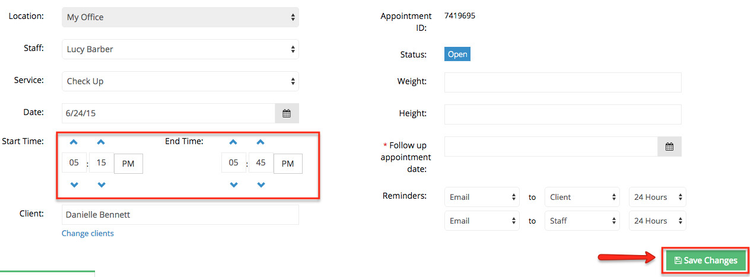
Pressing the "Save Changes" button will bring up the prompt window to make sure that you really wish to save, select whether you want to notify the client or staff person, and enter in any change notes to go in the email that is sent out to them. Once you've selected the email recipients and entered in any change notes you may like, press the "Save Changes" button from that window to commit the new date to the appointment:
After you press "Save Changes" the audit trail will update with a time and date stamp for the change you just made as well as the username of the staff person who made the change (it would be "Webclient" if the client went in and rescheduled him/herself ):
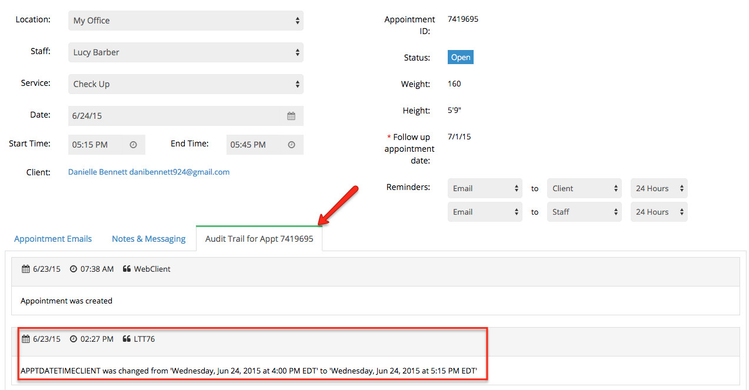
Once you've finished changing the time of the appointment, you can navigate away from the appointment detail screen. You'll see the updated time for the appointment show on all of the appointment list views as well as the calendar view.
If you want to swap out the service you are rendering during an appointment, you can do so in Edit mode and have the time of the appointment update automatically based on the duration for the new service you selected. To get started, navigate to the appointment detail view for the appointment you wish to change the service for and click the blue "Edit" button:
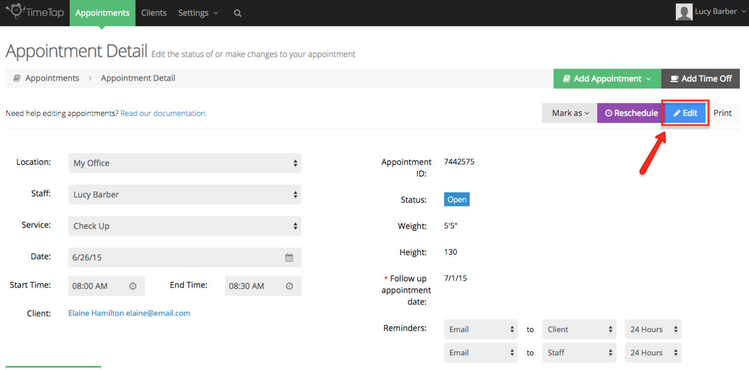
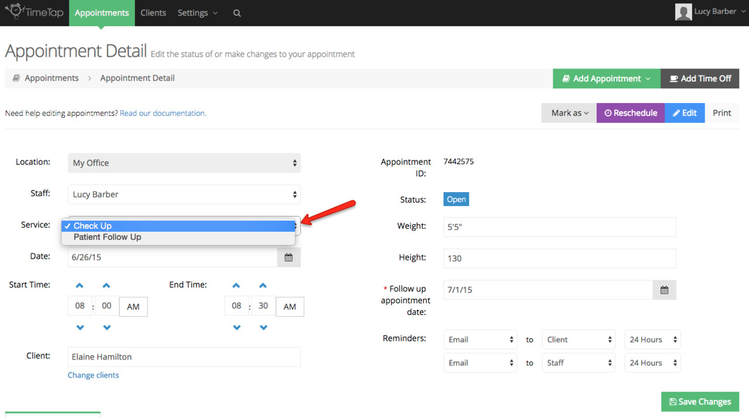
After clicking the "Edit" button, you'll see the disabled fields on the screen which can be changed become editable. If you click the "Service" dropdown you will see the other services you can change it to:
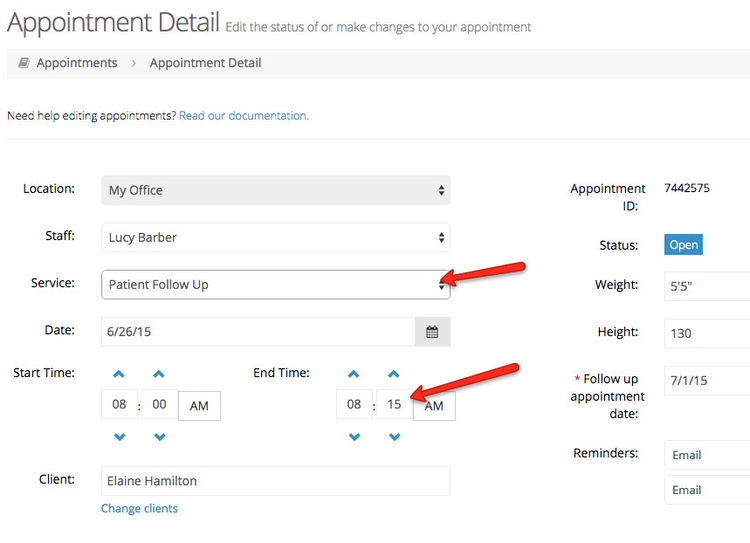
Select the service you want to change the appointment to and you'll see the start and end time of the appointment adjust if the new service is a different duration than the old service:
Once you've finished changing the service, press the green "Save Changes" button at the bottom of the screen:
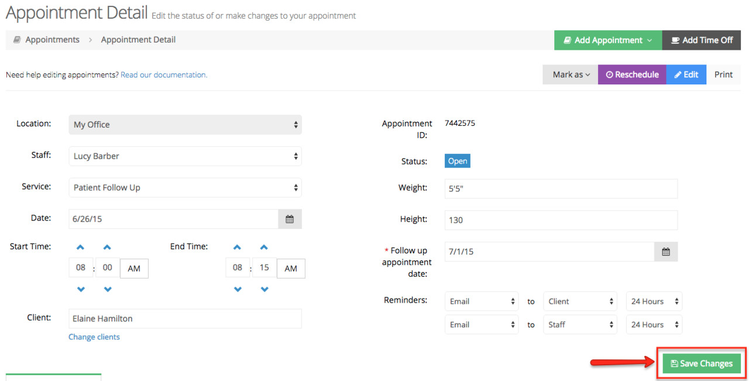
Pressing the "Save Changes" button will bring up the prompt window to make sure that you really wish to save, select whether you want to notify the client or staff person, and enter in any change notes to go in the email that is sent out to them. Once you've selected the email recipients and entered in any change notes you may like, press the "Save Changes" button from that window to commit the new date to the appointment:
After you press "Save Changes" the audit trail will update with a time and date stamp for the change you just made as well as the username of the staff person who made the change (it would be "Webclient" if the client went in and rescheduled him/herself ):
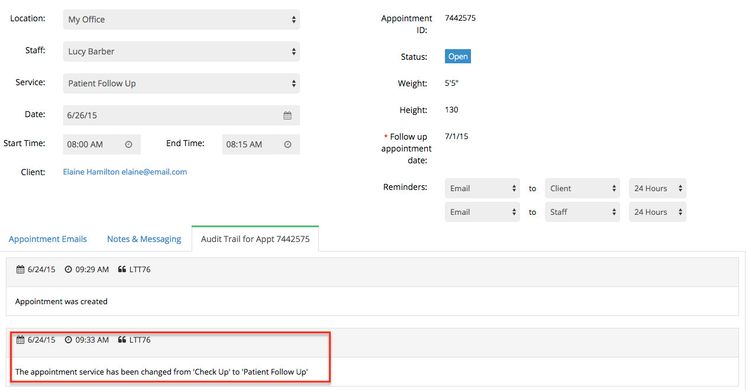
Once changes from swapping out your service are saved on the appointment, then you can navigate away from the appointment detail screen. You'll see the updated service for the appointment show on all of the appointment list views.