If you have read the other documentation on categorizing appointments by status, then you'll know that all appointments start out in "Open" status. After that, an appointment can move to any other status and be found in the respective list for that status. Appointments can be opened and thus changed to Open status from any of the other statuses.
If you use appointment categorization correctly, then Open should be synonymous with Upcoming. If you don't accurately move appointments after their appointment date to the respective status (either No Show or Completed) then your Open appointments may include some past appointments as well.
This help doc covers:
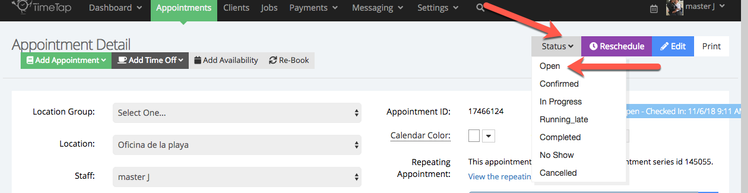
To open the appointment from the checked in appointment detail view, navigate to the appointment detail, click the Status dropdown and select "Open":
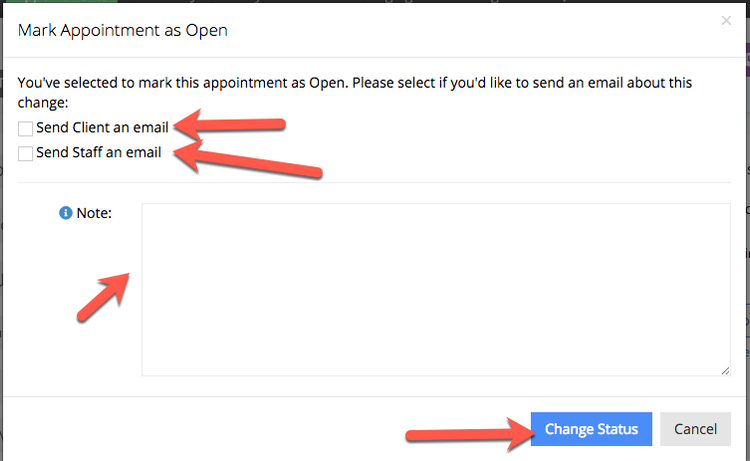
After selecting that you want to Open the appointment, you will be prompted with whether you want to send an email about the opened status. If you do want to send an email, the email template for Appointment Edited/Rescheduled will send out to the client and the staff. You can add in a note which will be inserted into the email as well. After you've decided on the email recipients and written the accompanying note, you can press "Change Status":
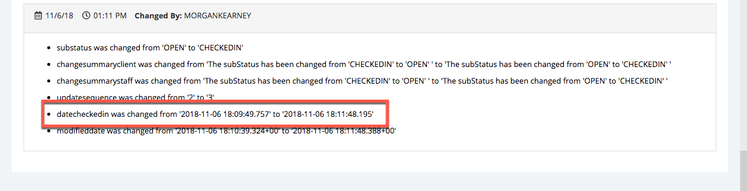
This will change the displayed appointment status on the screen back to just Open. The next time you check the appointment in, under the Audit Trail tab at the bottom of the screen it will time stamp it with the new check in time:
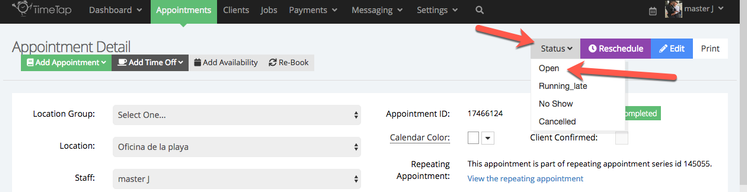
To open the appointment from the completed appointment detail view, navigate to the appointment detail, click the Status dropdown and select "Open":
After selecting that you want to Open the appointment, you will be prompted with whether you want to send an email about the newly reacquired opened status. If you do want to send an email, the email template for Appointment Edited/Rescheduled will send out to the client and the staff. You can add in a note which will be inserted into the email as well. After you've decided on the email recipients and written the status changed note, you can press "Change Status":
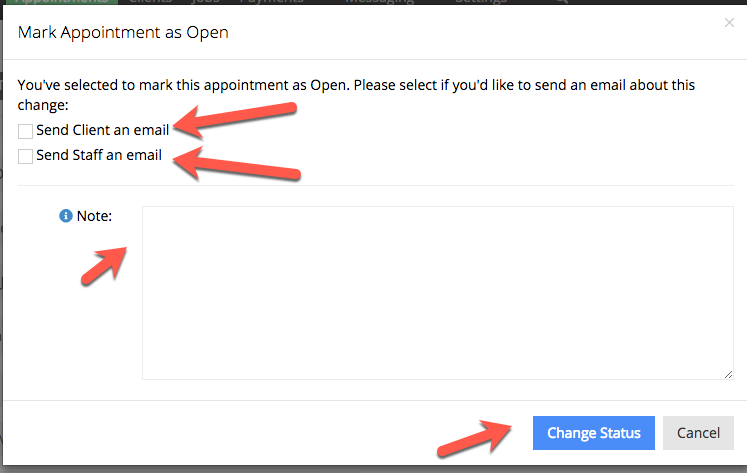
This will change the displayed appointment status on the screen back to just Open and time stamp the Audit Trail with the change:
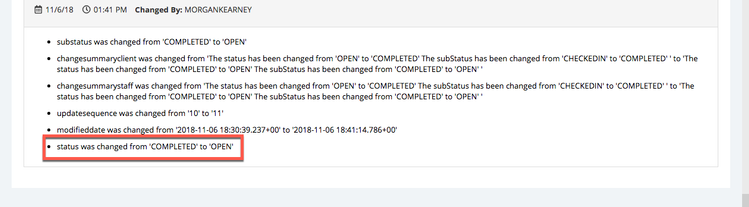
As mentioned above, you can also mark a Completed appointment as Open from the Completed Appointment list. To do so, navigate to Appointments → Appointment Lists → Completed and select the appointments you want to Open. After selecting them, click the "Status" dropdown then click on "Open":
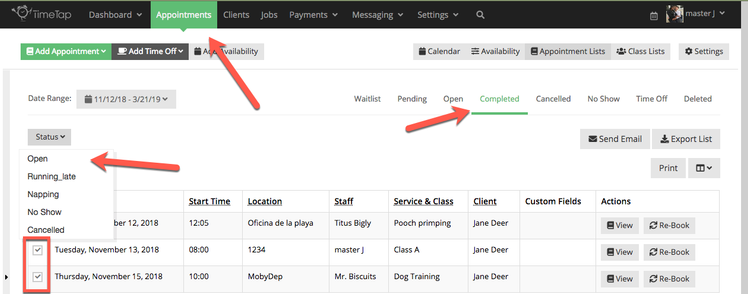
Clicking the button to open them will bring up the confirmation window where you will select whether you want to send the Appointment Edited/Rescheduled email to the client and/or the staff. After selecting the email recipients and entering in an status changed note, you can press "Change Status" which will move them back to the Open appointments list:
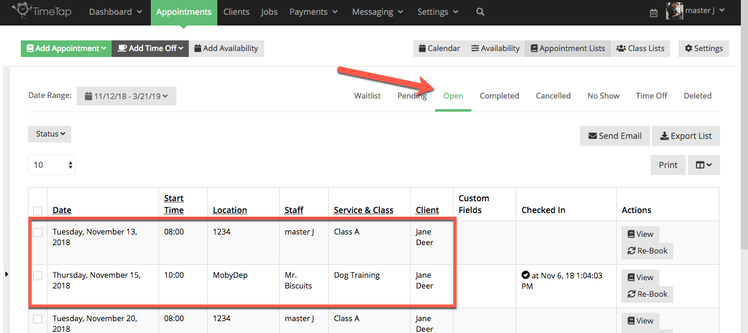
As the page reloads to the Open List view, you'll see the previously completed appointments displaying there:
Re-Opening Cancelled Appointments
There will be times when a client may cancel an appointment thinking he/she won't be able to come. Then, later, they'll give you a call saying they can come and is there any way to get the appointment back? So long as you still have that appointment spot open, you can easily say "Why yes! I can easily open your cancelled appointment for you  ".
".
You can open cancelled appointments from either the cancelled appointment detail view or the cancelled appointment list view. To open a cancelled appointment from the appointment detail view, select the Status dropdown and click "Open:
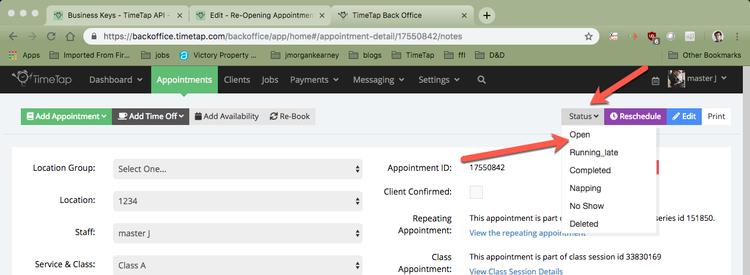
After selecting that you want to Open the appointment again, you will be prompted with whether you want to send an email about the open status. If you do want to send an email, the email template for Appointment Edited/Rescheduled will send out to the client and the staff. You can add in a note which will be inserted into the email as well. After you've decided on the email recipients and written the status change note, you can press "Change Status":
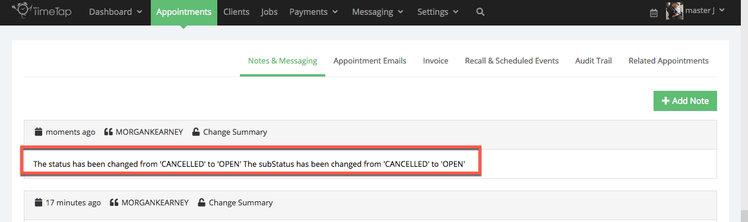
This will change the displayed appointment status and substatus on the screen back to just Open.
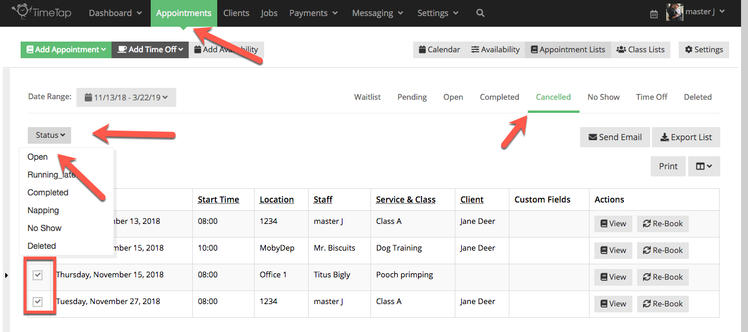
As mentioned above, you can also mark a Cancelled appointment as Opened from the Cancelled Appointment list. To do so, navigate to Appointments → Appointment Lists → Cancelled and select the appointments you want to Open. After selecting them, click the "Open" button:
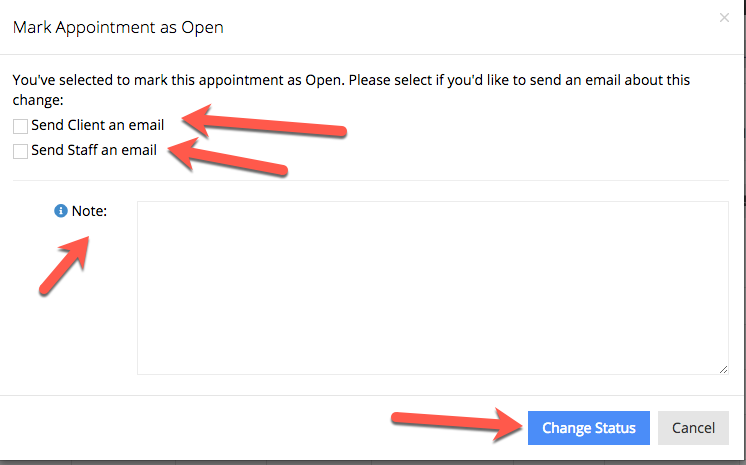
Clicking the button to open them will bring up the confirmation window where you will select whether you want to send the Appointment Edited/Rescheduled email to the client and/or the staff. After selecting the email recipients and entering in a status change note, you can press "Change Status", which will move them back to the Open appointments list:
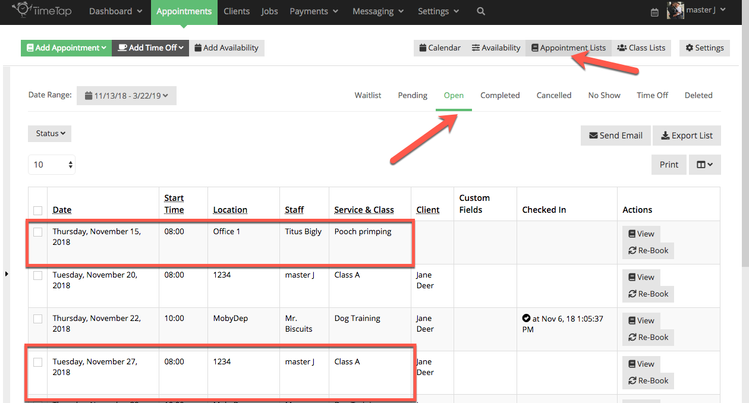
As the page reloads to the Open List view, you'll see the previously cancelled appointments displaying there:
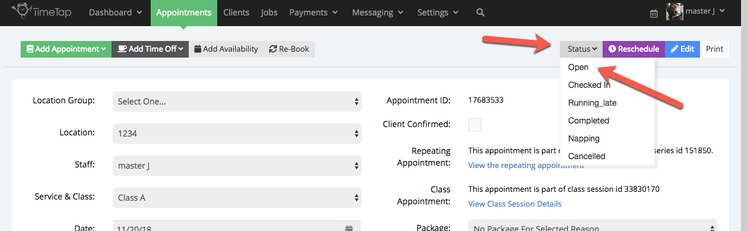
After selecting that you want to Open the appointment, you will be prompted with whether you want to send an email about the open status. If you do want to send an email, the email template for Appointment Edited/Rescheduled will send out to the client and the staff. You can add in a note which will be inserted into the email as well. After you've decided on the email recipients and written the open note, you can press "Change Status":
This will change the displayed appointment status on the screen back to just Open and time stamp it with the change:

As mentioned above, you can also mark No Show appointments as Open from the No Show Appointment list. To do so, navigate to Appointments → Appointment Lists → No Show and select the appointments you want to Open. After selecting them, click the "Open" button:
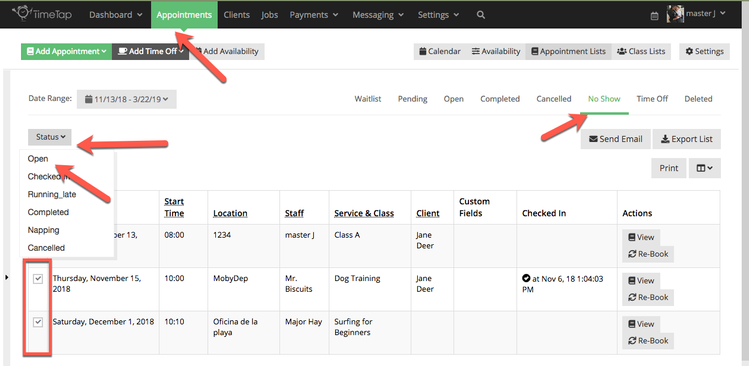
Clicking the button to open them will bring up the confirmation window where you will select whether you want to send the Appointment Edited/Rescheduled email to the client and/or the staff. After selecting the email recipients and entering in a status change note, you can press "Change Status" which will move them back to the Open appointments list:
As the page reloads to the Open List view, you'll see the appointments previously listed as No Shows displaying there:
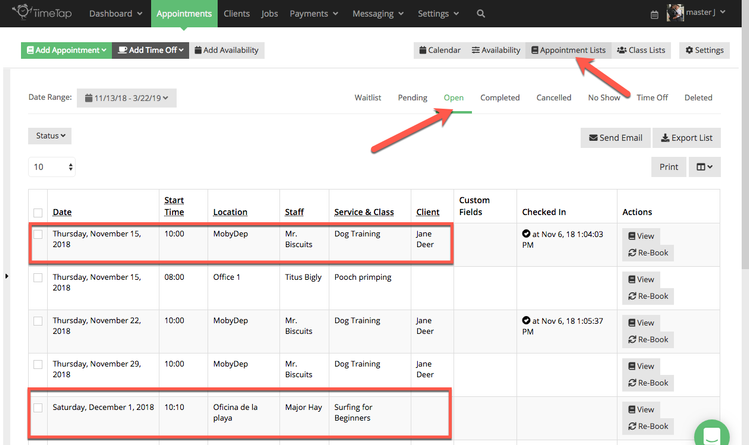
Viewing All Open Appointments
To see all the appointments currently in Open status, you can use the Open Appointments list. This will display all Open appointments, Checked In appointments, and any Open appointments that were previously under another status. The list can be found under Appointments → Appointment Lists → Open:

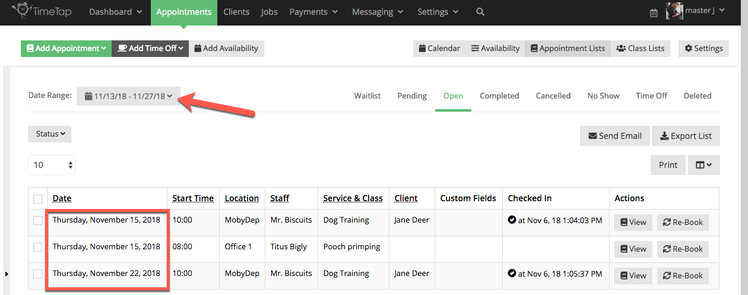
If you customize the date range for this view, you'll see only open appointments set in that date range:
Open appointments are also displayed on the Calendar view where you can click into them and view their appointment details as well.