We hate it when it happens, but it's a reality. At some point, one of your clients will not show up for his/her appointment. As such, you can categorize these appointments as No Show.
Appointments can be marked as No Show from any status. Once an appointment is listed as "No Show" it can then be Re-Opened, marked Completed, or marked as Cancelled.
If you mark appointments as No Show, you have the option to send out an email to the Client about the changed status. A time stamp of the status change will be listed on the Audit Trail for the appointment after you mark it as No Show.
In this documentation, we will go through how to:
We will also discuss what can be done once appointments are listed as No Show and how you can make these changes in both List views or the Appointment Detail view.

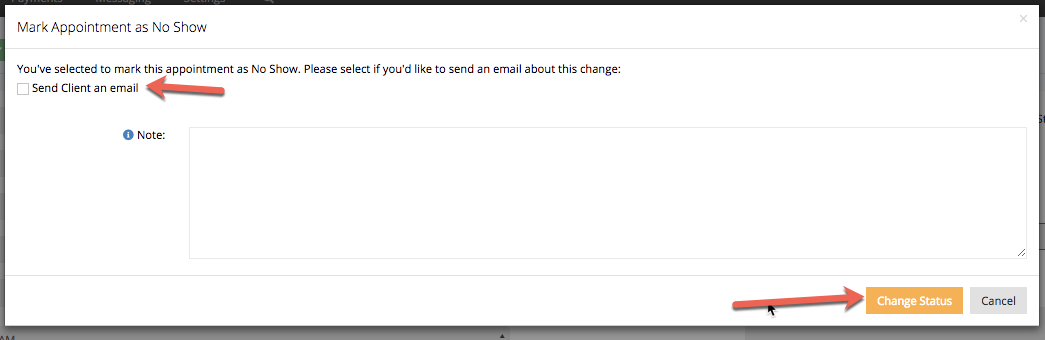
At this point, you will be prompted with the option to send out a No Show email to the Client. You can select who you want to notify about the No Show appointment status and then add a No Show Note that will be inserted into the body of the email:
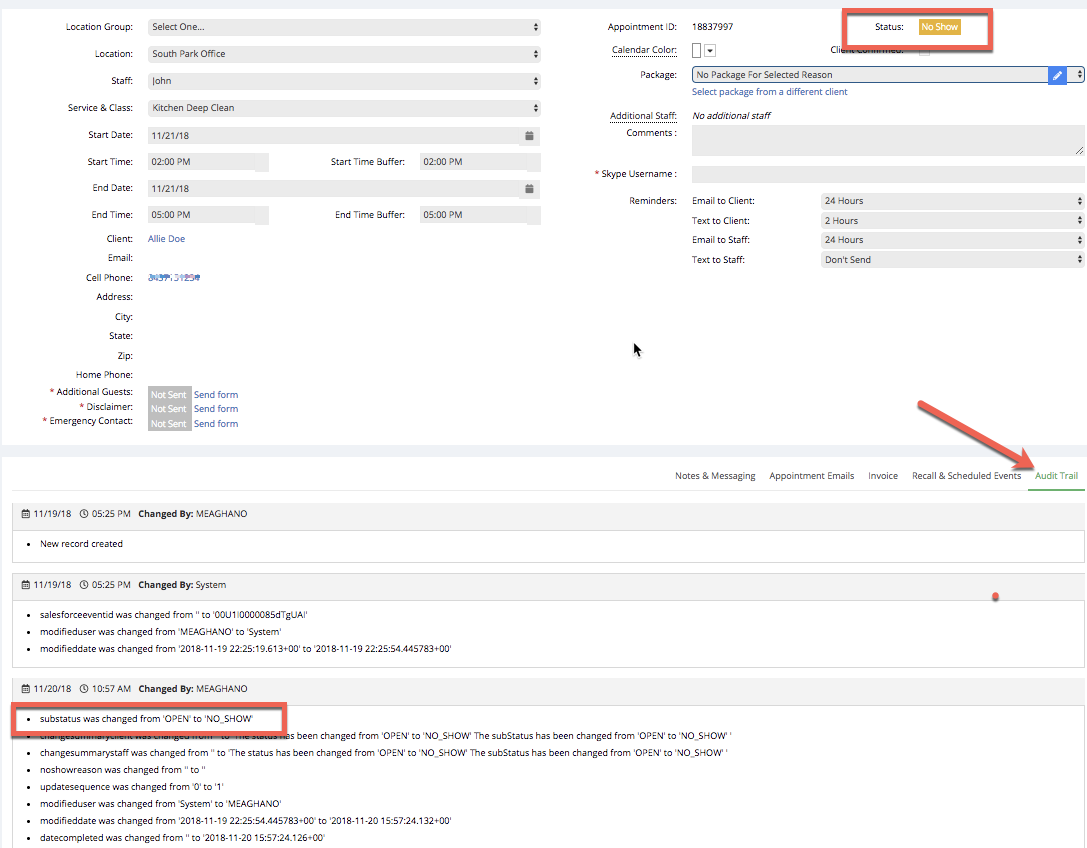
After you press Confirm as No Show, the appointment detail record will update and show the appointment status as "No Show". You will also see a time stamp of the status change on the Audit Trail:
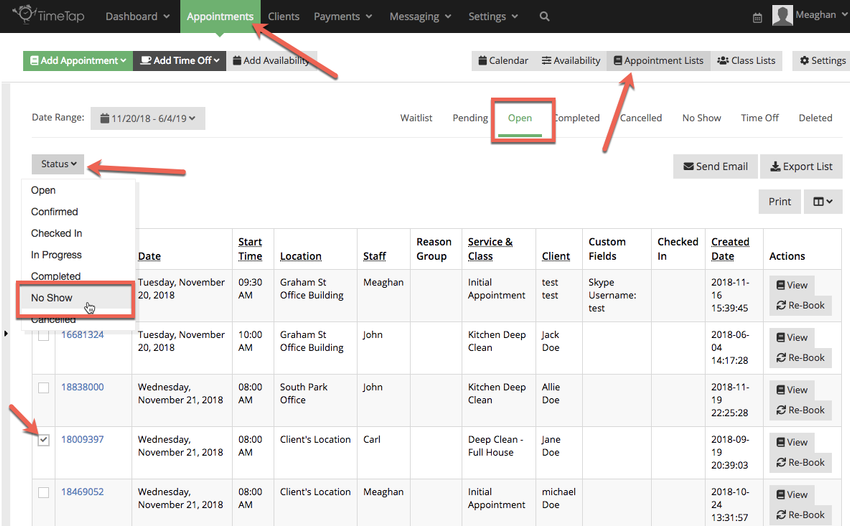
Open appointments can also be marked as No Show from the Open appointments list. To do this, navigate to Appointments → Appointment Lists → Open and select the appointment(s) from the list that you want to mark as No Show. Then click the status dropdown menu and select "No Show":
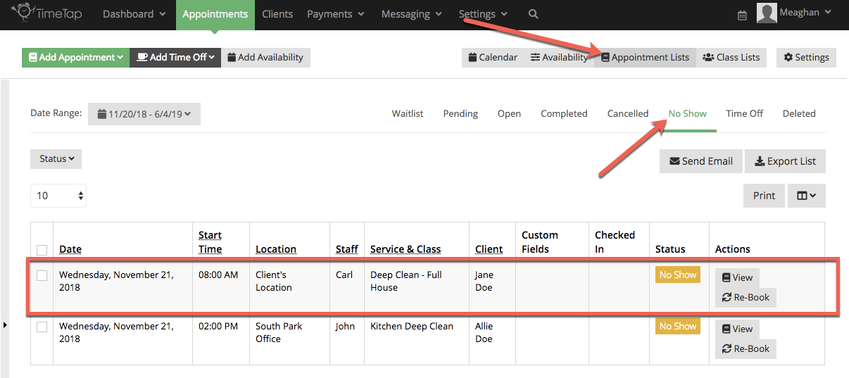
After confirming that you do indeed want to mark the selected Open appointment as No Show, the appointment(s) you selected will display in the No Show Appointments list:
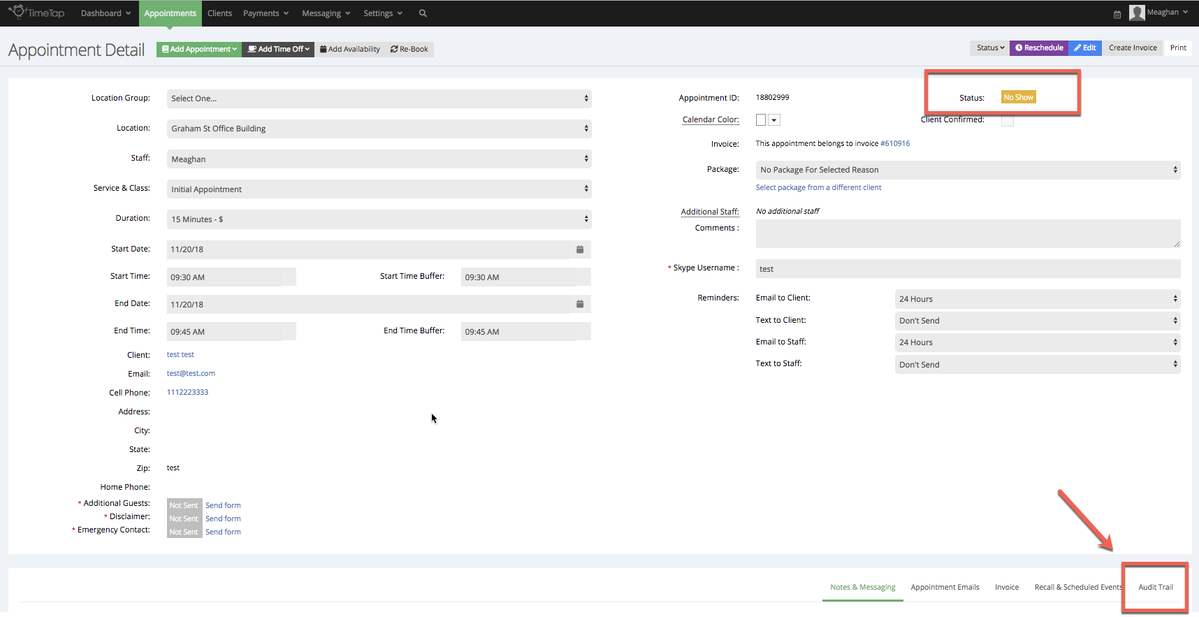
To check a client out as No Show from the Appointment Detail view, select the Status dropdown and click the "No Show" option:

At this point, you will be prompted with the option to send out a No Show email to the Client. Remember, when you checked the client in, they were not sent an email about the Checked In status change as Checked In is a sub-status of Open and really just used for internal organizational purposes. You can select who you want to notify about the No Show appointment status and then add a No Show Note that will be inserted into the body of the email:
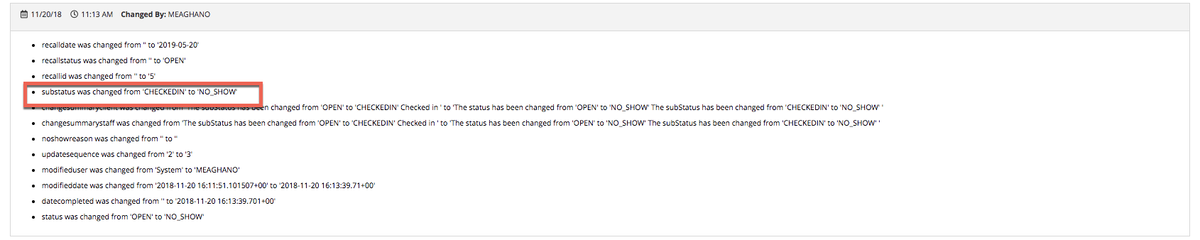
After you press Confirm as No Show, the appointment detail record will update and show the appointment status as "No Show". You will also see a time stamp of the status change on the Audit Trail:
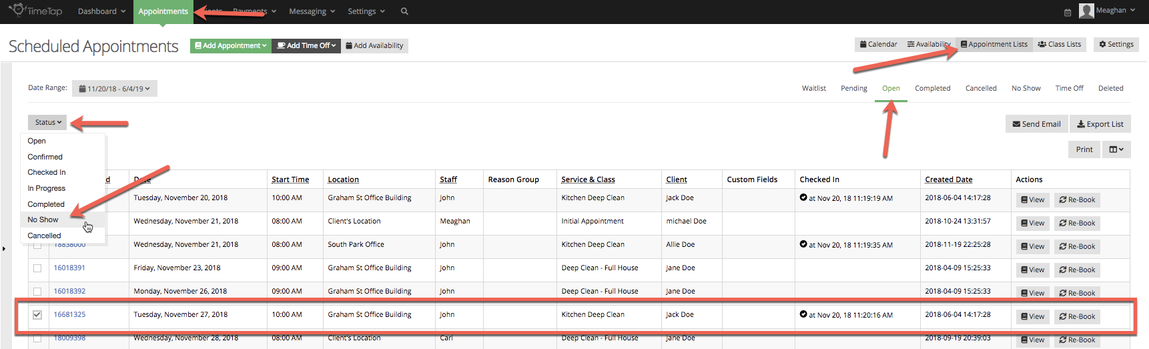
This can also be done from the Checked In appointments List view. To do this, navigate to Appointments → Appointment Lists → Open and select the appointment(s) you want to check out/ mark as a No Show:
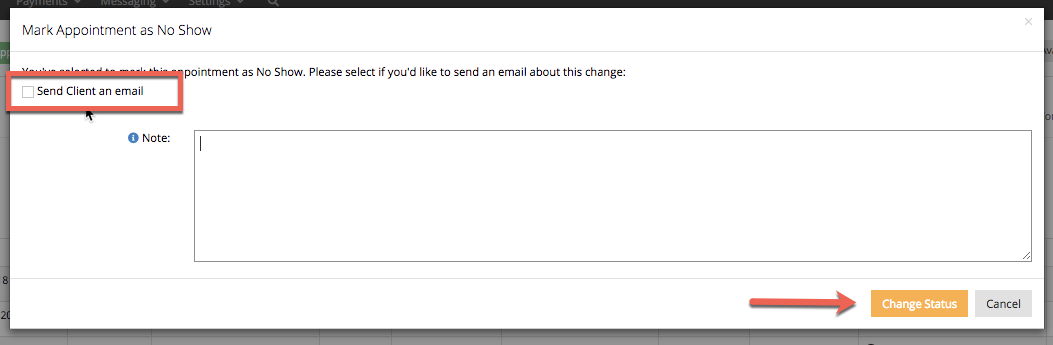
You will again see the confirmation modal, you will have the option to send the "No Show" appointment template to the client and add a note before you click change status:
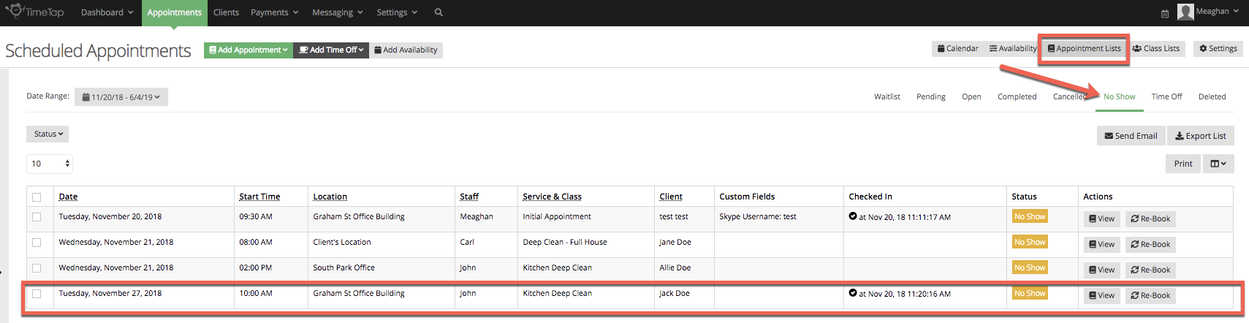
Once you press Confirm as No Show, your screen will update and display the new appointments you just marked as No Show in the No Show List view:
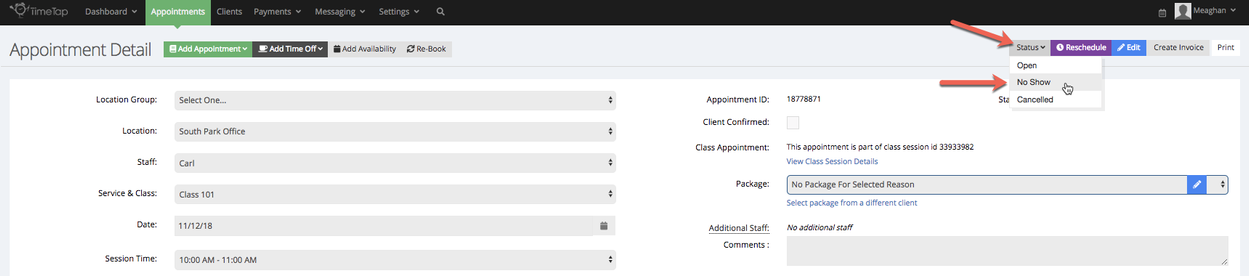
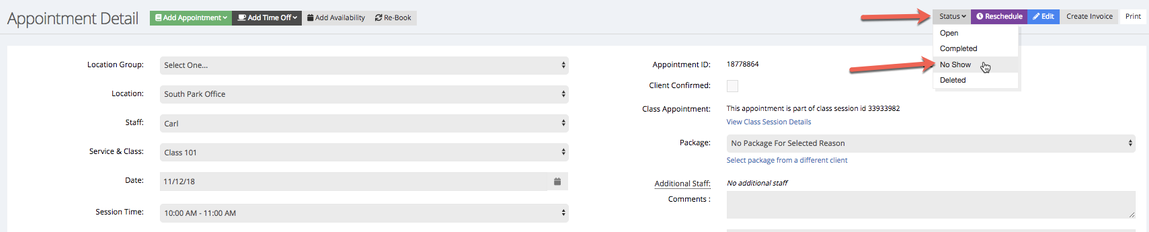
You can do this either from the Appointment Detail screen for a Completed appointment or from the Completed Appointments list view. To move a Completed Appointment to No Show status from the Appointment Detail page, go to the appointment record and from the Status drop down select No Show:
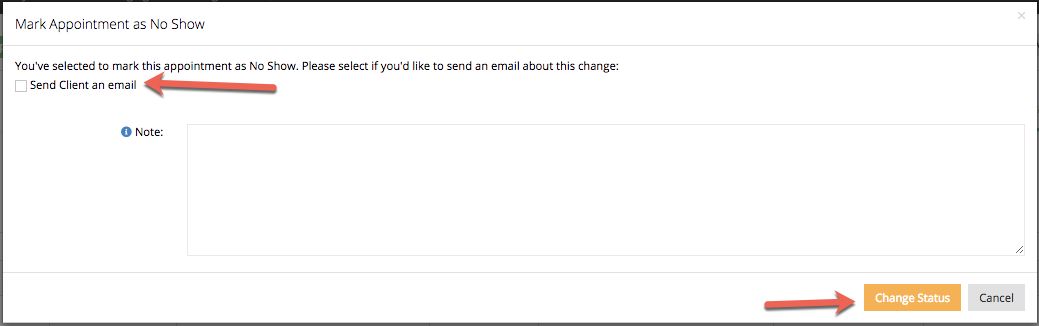
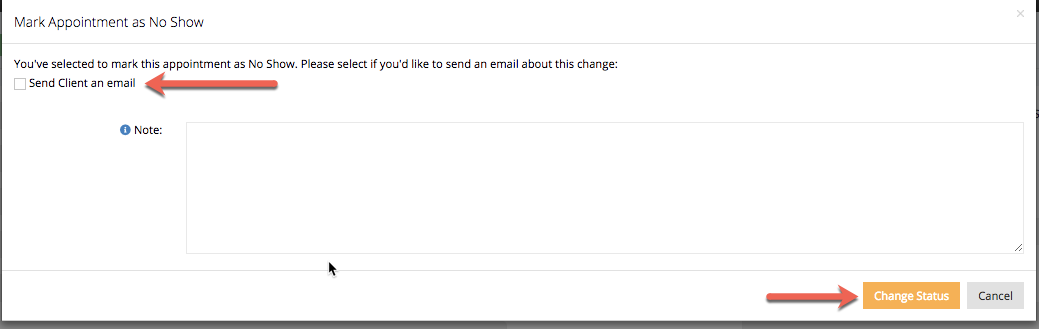
At this point, you will be prompted with the option to send out a No Show email to the Client. You can select who you want to notify about the No Show appointment and then add a No Show Note that will be inserted into the body of the email:
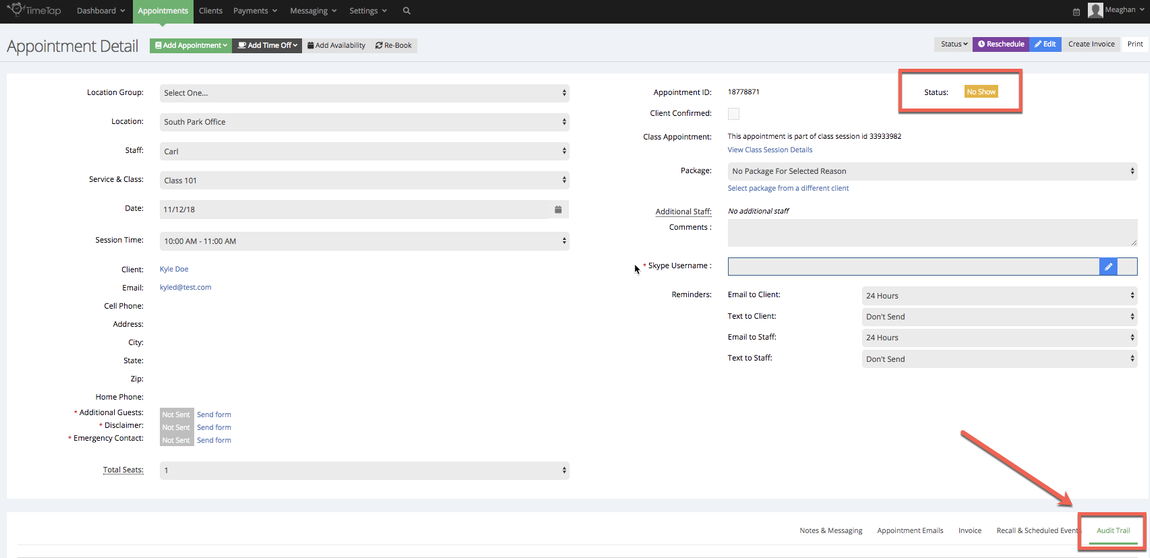
Once you press Change Status as No Show from the modal, you will see that the status updated to "No Show" and the time stamp for the status change is indicated in the Audit Trail:

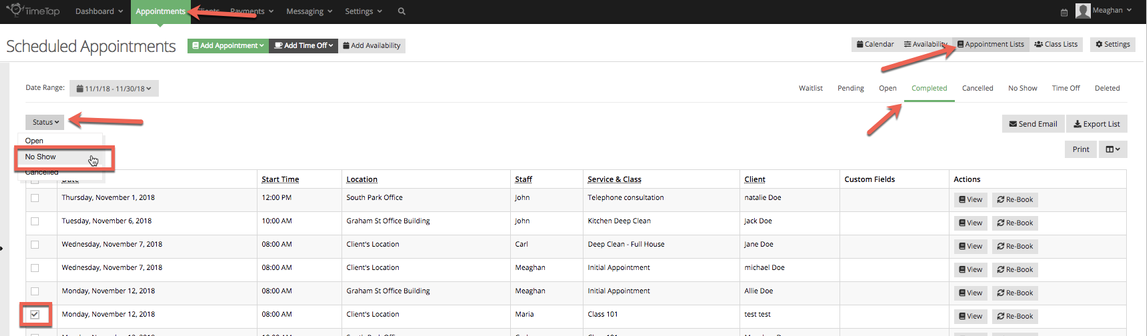
As mentioned, you can also change Completed Appointments to No Show from the Completed Appointments list. To do this, navigate to Appointments → Appointment Lists → Completed and select the appointments from the list that you want to mark as No Show. Then hit the Status dropdown and select "No Show":
In the confirmation message as you are marking appointment as No Show, you will have the opportunity to send an email to the client and add any notes that will be inserted into the body of the email before you click the Change Status button:
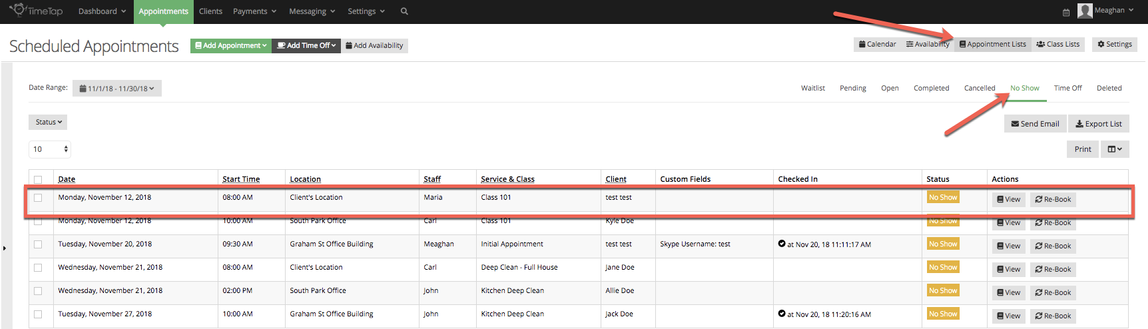
After you confirm you want to move the Completed Appointments to No Show Status, the screen will update to show you the No Show Appointments list with the appointments you just re-categorized in there.
At this point, you will be prompted with the option to send out a No Show email to the Client. You can select who you want to notify about the No Show appointment and then add a No Show Note that will be inserted into the body of the email:
Once you press Confirm as No Show from the modal, you will see that the status updated to "No Show" and the time stamp for the status change is indicated in the Audit Trail:
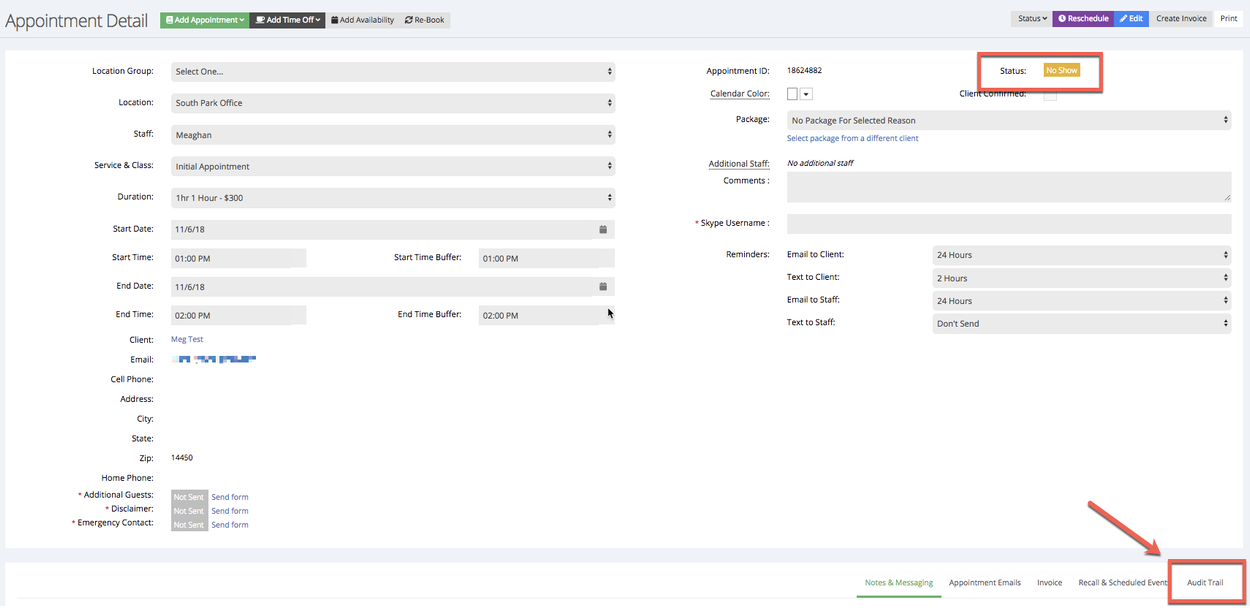
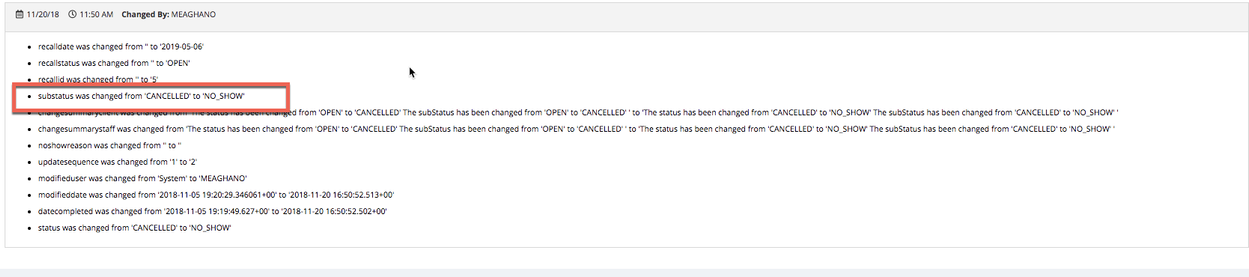
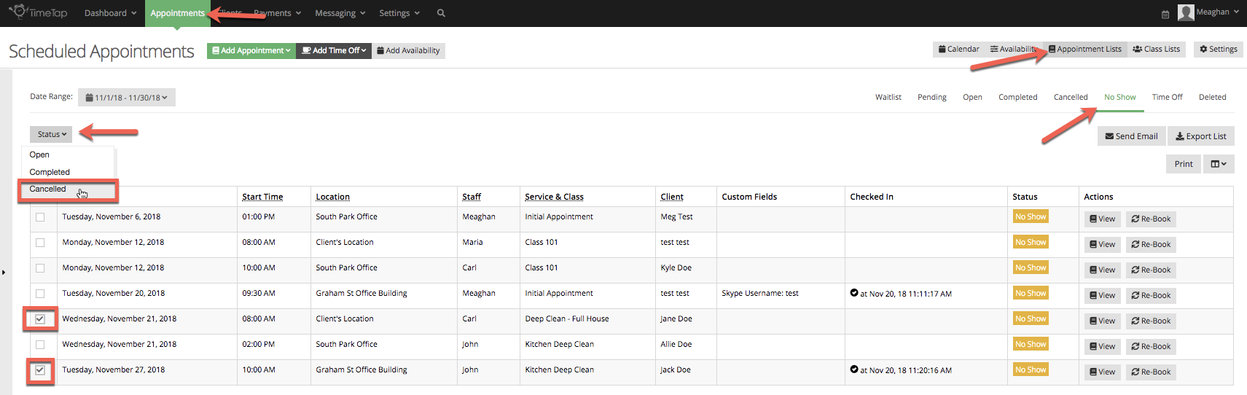
As mentioned, you can also change No Show Appointments to Cancelled from the No Show Appointments list. To do this, navigate to Appointments → Appointment Lists → No Show and select the appointments from the list that you want to mark as Cancelled. Then click the Status dropdown menu to select "Cancelled"
Since you have the option to make these status changes in bulk, the confirmation message will give you the option to send a cancellation notification to both the client(s) and staff member. You can also insert a cancellation note that will be inserted into the body of the email:
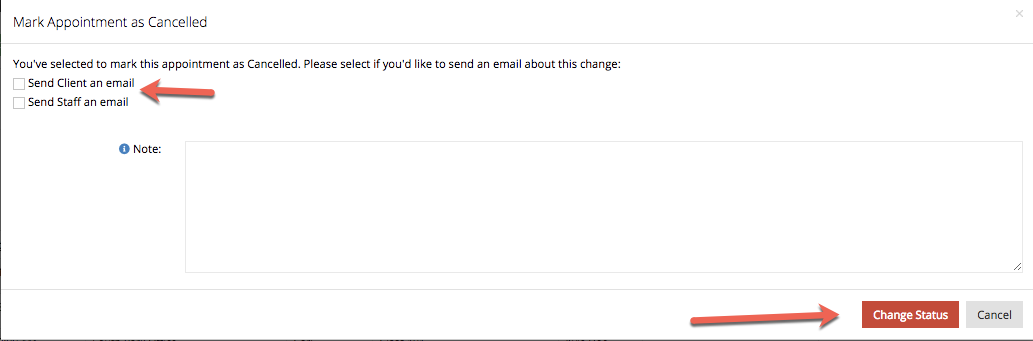
Keep in mind if you are cancellation multiple appointments at once you will want to keep the cancellation note general as it will apply to all appointments/clients you are cancelling.
After you confirm you want to move the No Show Appointments to Cancelled Status, the screen will update to show you the Cancelled Appointments list with the appointments you just cancelled in there.
Viewing No Show Appointments
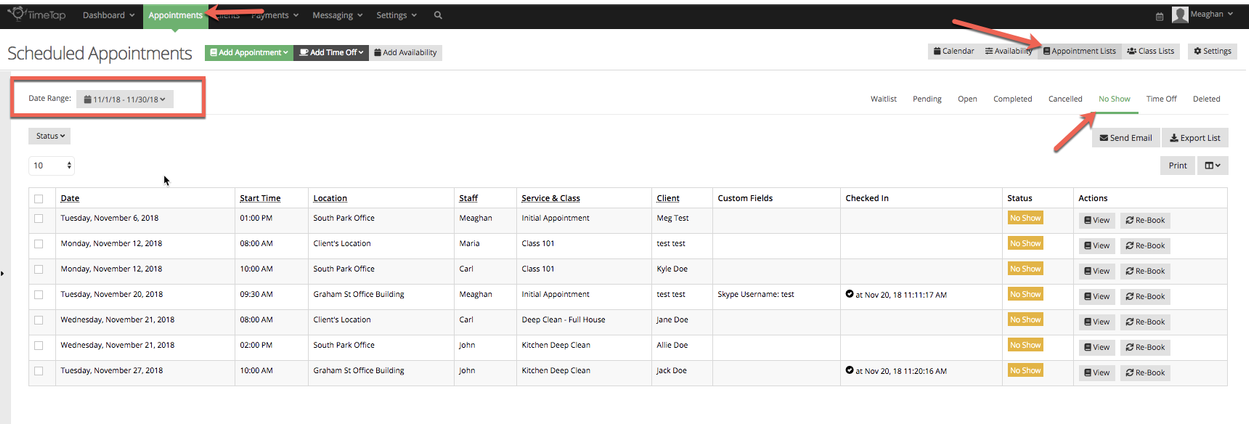
No Show appointments are also displayed on the Calendar view. This is different than Cancelled appointments which clear from the calendar view in order to make room for other appointments to be booked in their place.