TimeTap allows you to use webhooks to communicate with Zapier and send client and appointment data to another application. For an in-depth guide on what webhooks are and how they work, click here.
At this time data can only get sent one way - if data gets updated in the 3rd party application, it will not update in TimeTap.
In this example, we want to send appointment and client information to Zapier and then want Zapier to create a new row in our Google Sheet.
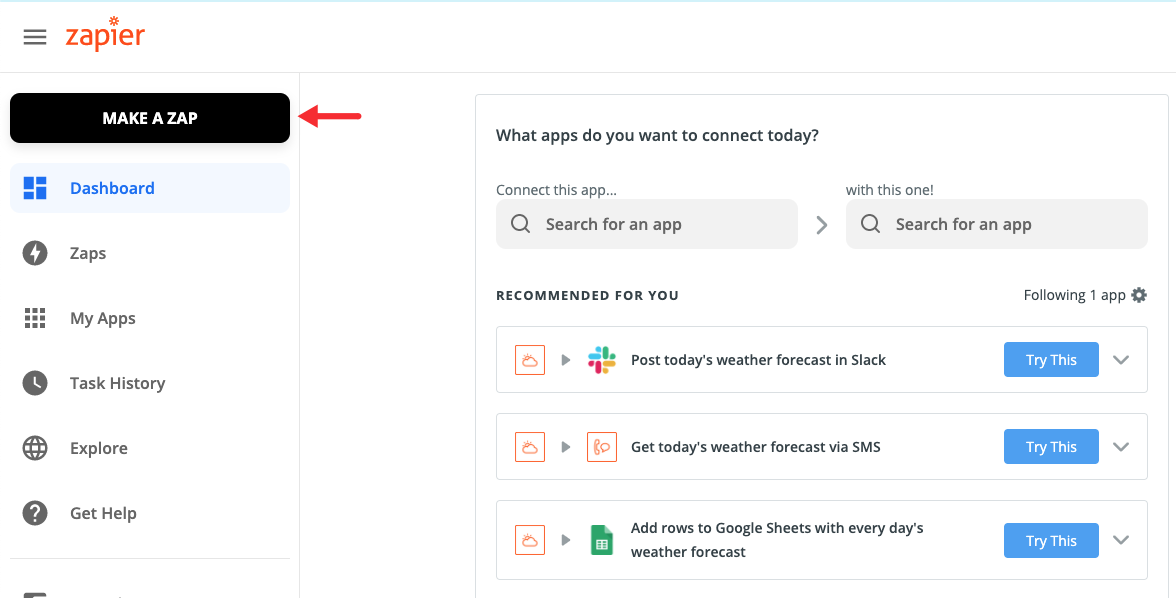
In Zapier, you'll need to click on the Make A Zap button -
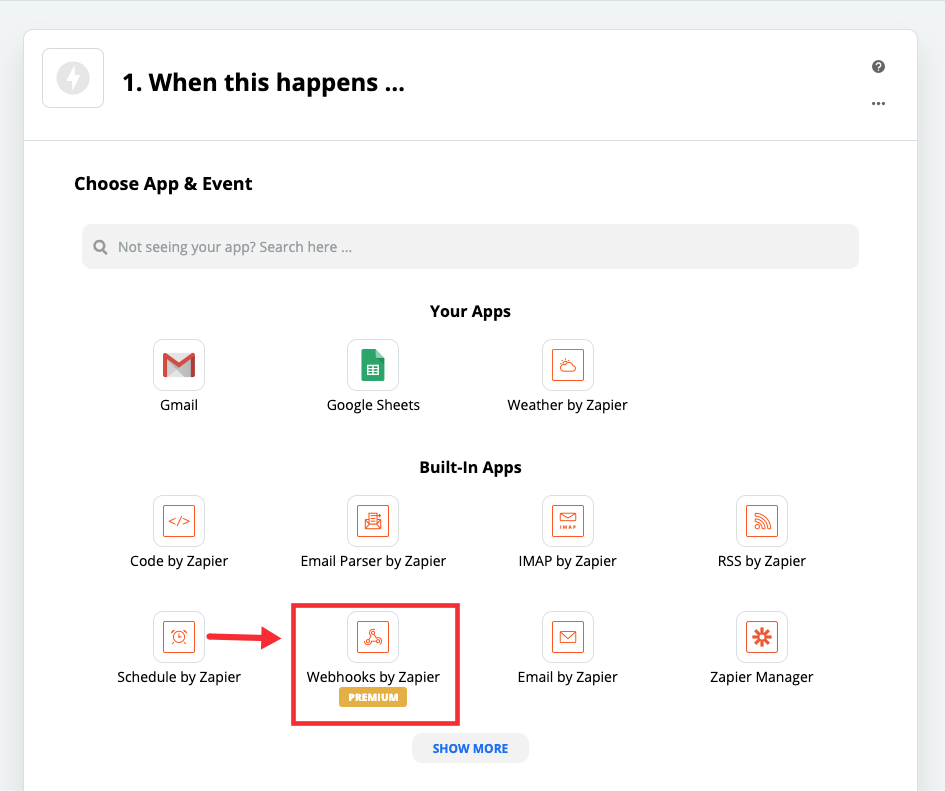
Next, select the Webhooks by Zapier option in the Built-In Apps section -
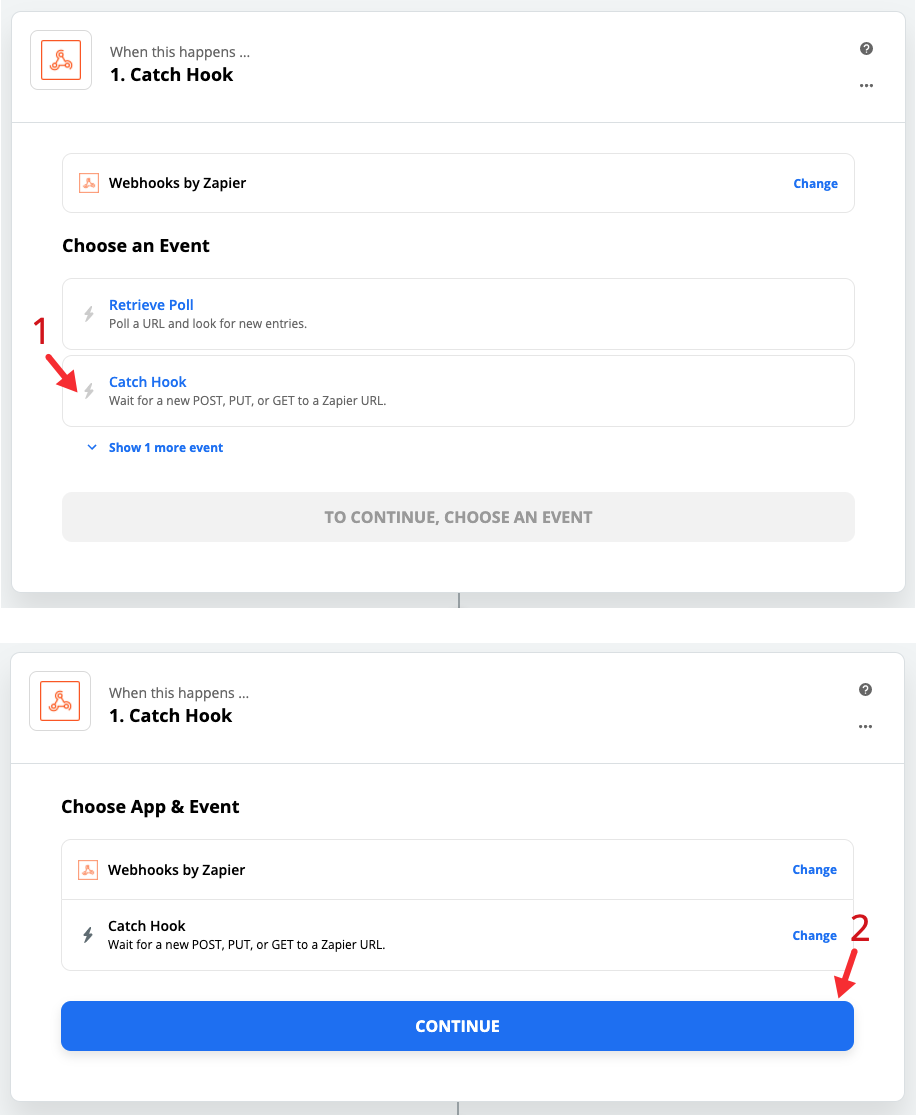
In the updated window, under the Choose an Event section select Catch Hook and then click on the blue Continue button -
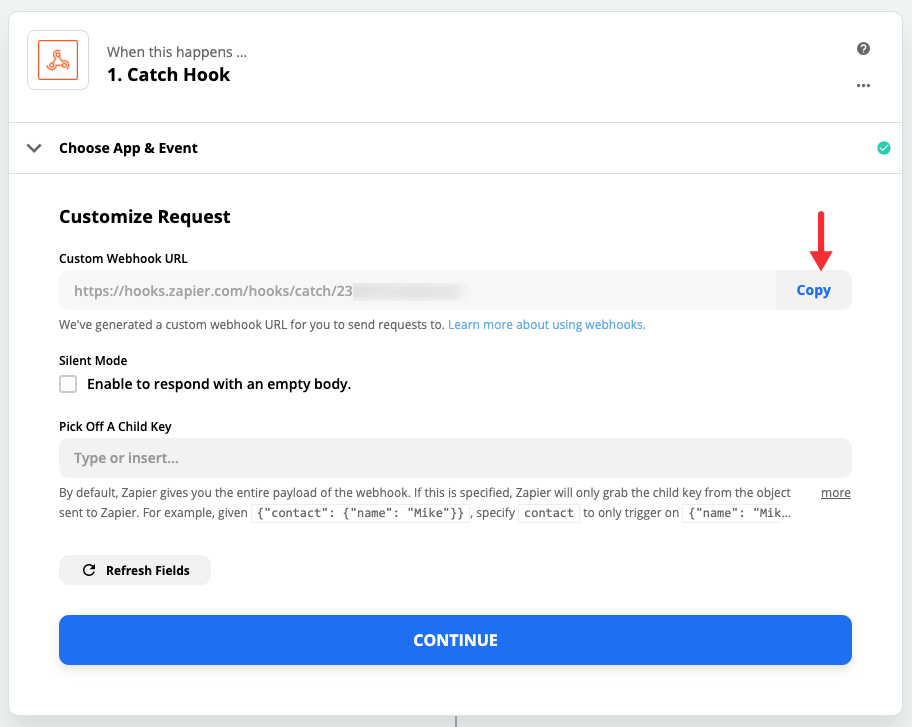
After you click to Continue, Zapier will create a custom webhook URL where TimeTap will send request (data). Copy the URL -
Log in to your TimeTap account, navigate to Settings > Integrations > scroll down to Other Integrations and click on Webhooks. After you've selected the Webhooks option, click on the green Activate Webhook button -
Paste the URL you copied in Zapier and click on the green Update Webhook URL button -

After the the URL successfully saves, go back to Zapier and click on the blue Continue button -
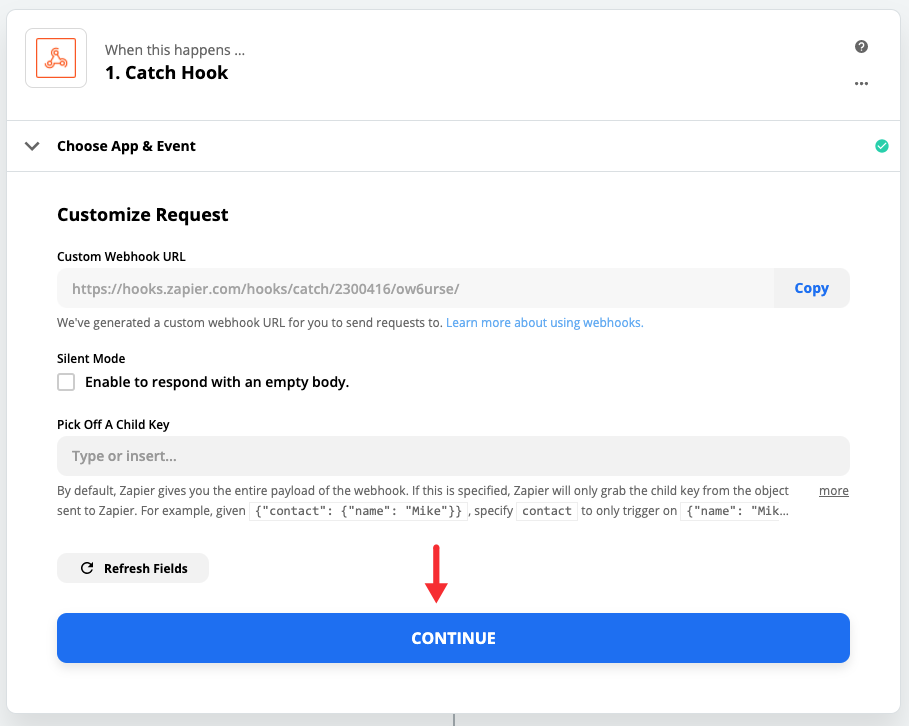
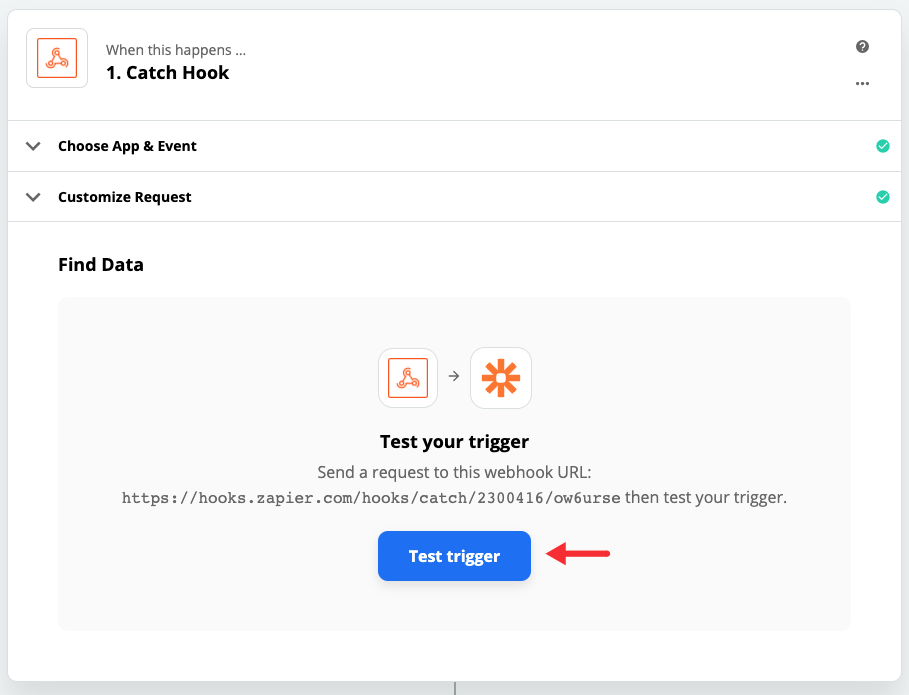
When the Test Trigger option appears on the screen, go back to TimeTap and schedule a test appointment - this appointment can be booked from the Backoffice or from the Client Scheduler -
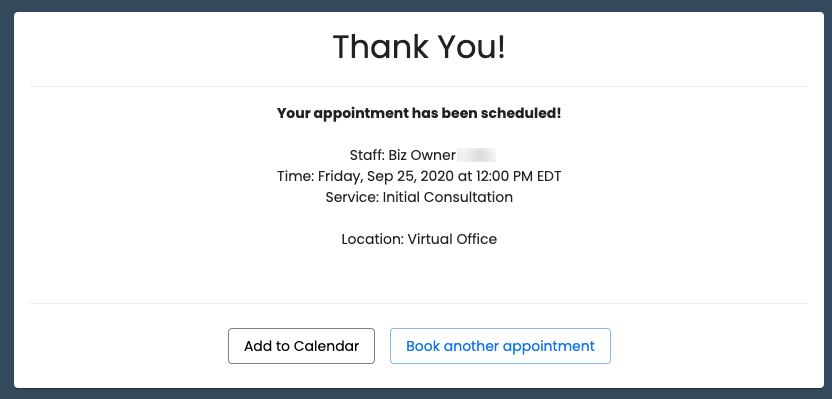
After the appointment is booked, go back to Zapier and click on the blue Test Trigger button -
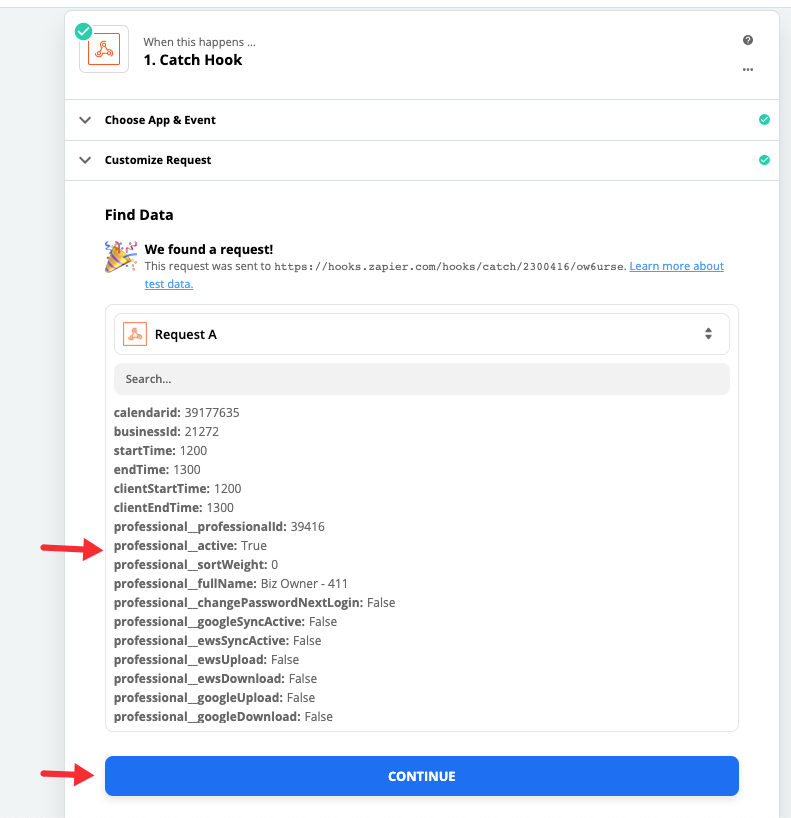
Clicking on the Test Trigger button will display all the data that TimeTap sent to Zapier. You'll then need to click on the blue Continue button -
Now, we have to tell Zapier what to do with the information that TimeTap sends. In this example, we want to create a spreadsheet row in our Google Sheets spreadsheet, so we'll select Google Sheets -
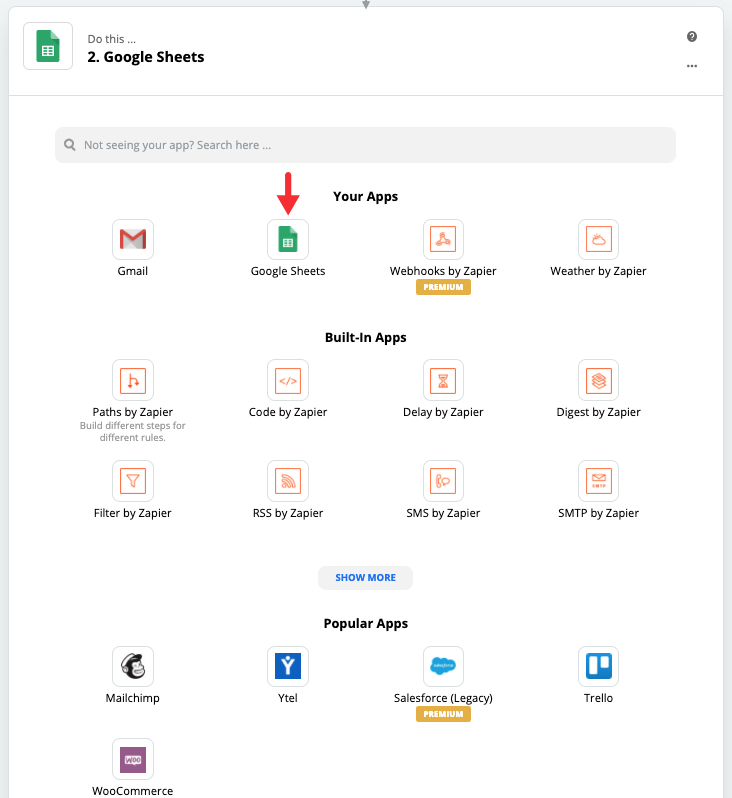
After we select Google Sheets, Zapier will display the events that it creates with the data TimeTap is sending - for this example, we'll select Create Spreadsheet Row -
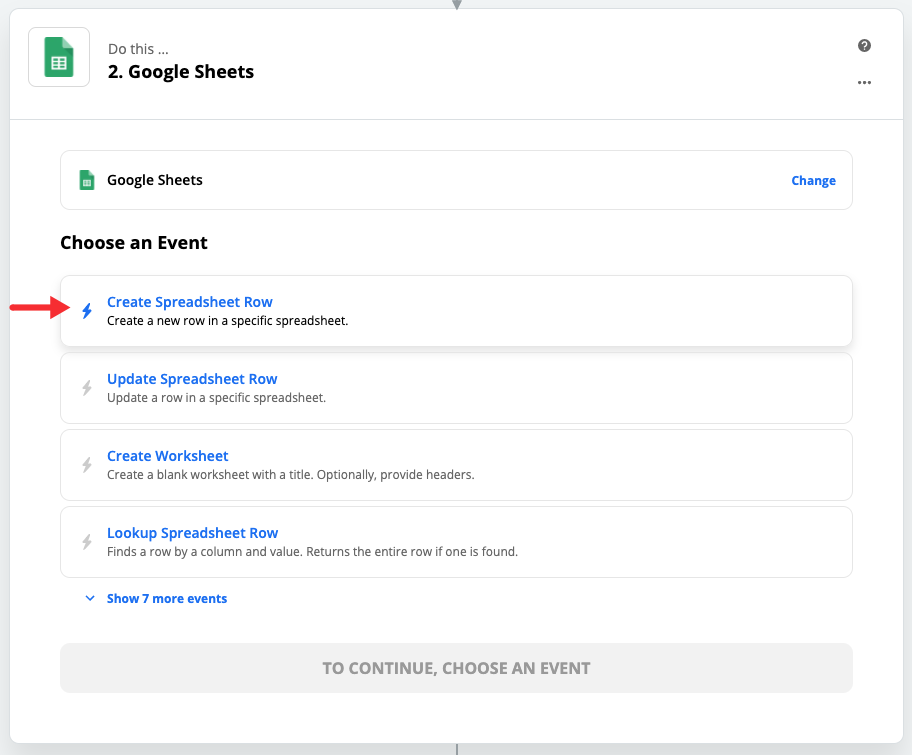
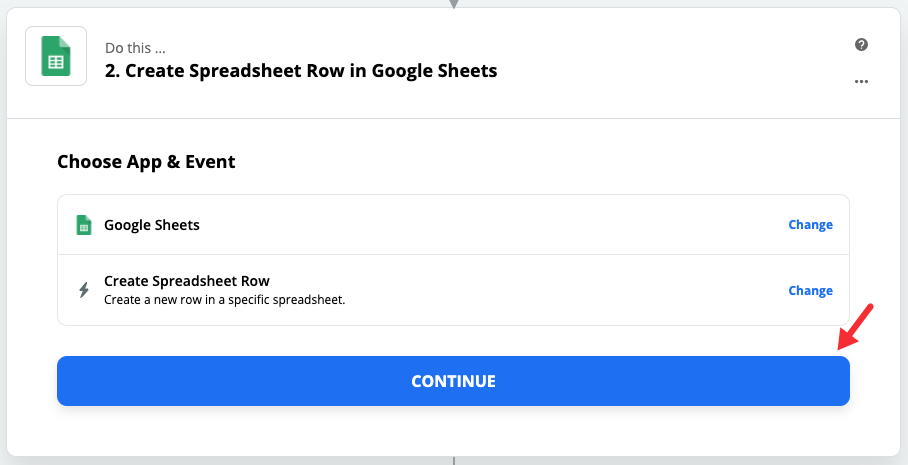
After selecting the event, we'll click on the blue Continue button to begin mapping the data in our spreadsheet -
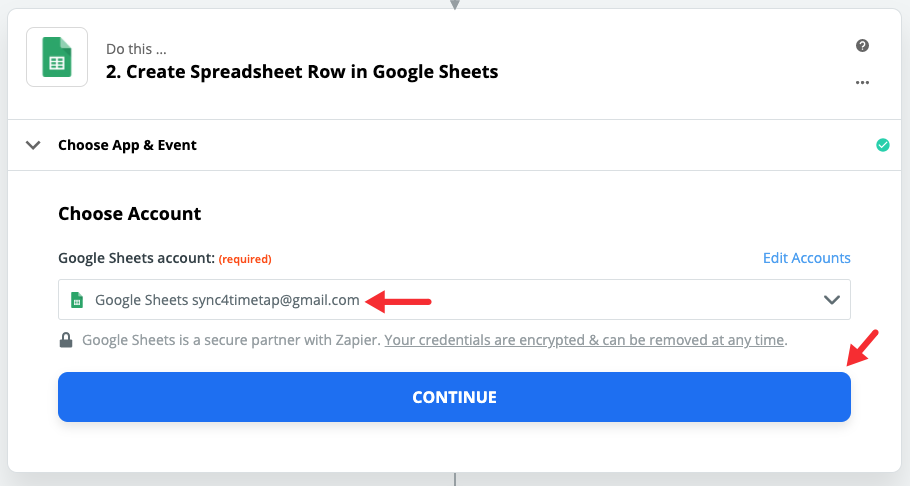
Select the Google Account where the spreadsheet is created and click on the blue Continue button -
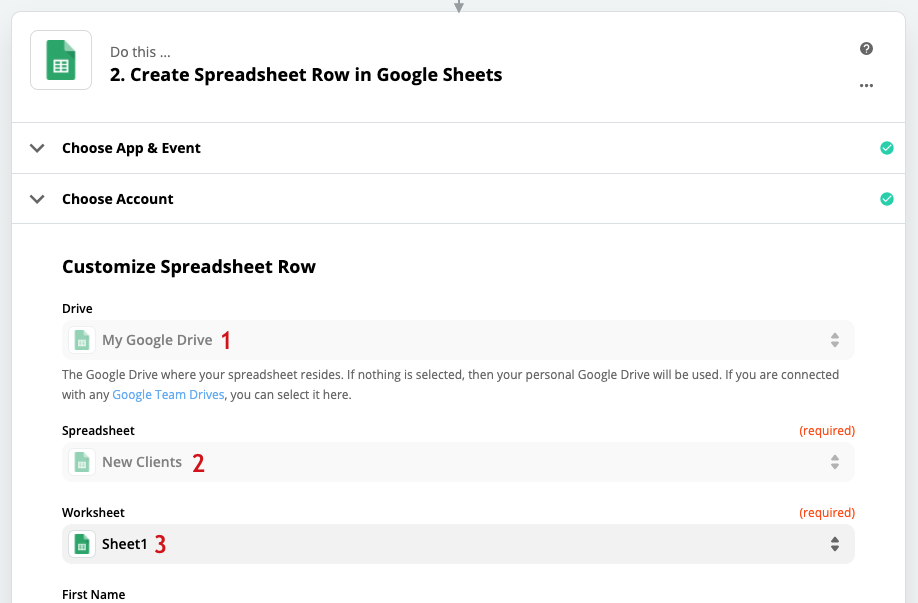
Next, we'll need to select the drive where the spreadsheet is located (1), select the spreadsheet where the information should be populated (2), and then select the worksheet within the spreadsheet (3) -
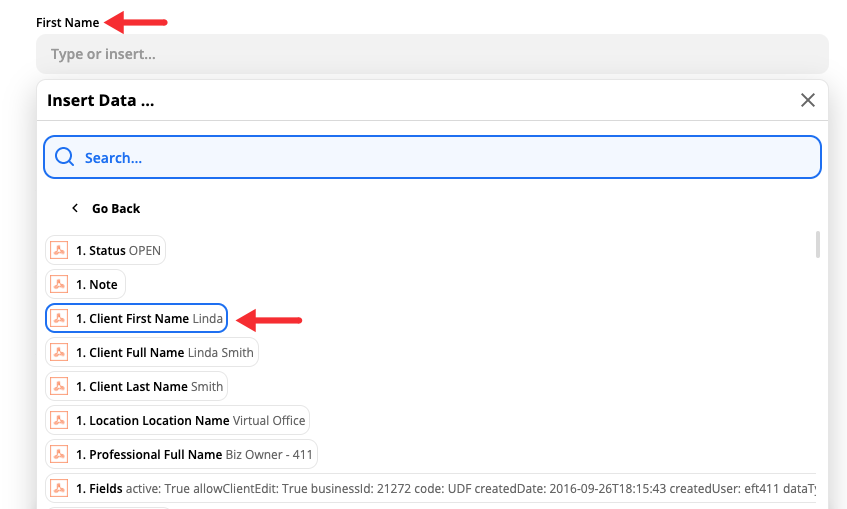
After the spreadsheet gets selected, the column labels will get displayed. Click on the column labels and locate the information that needs to get populated into each column. For example, in my column First Name I want to populate the first name of the client who booked the appointment -
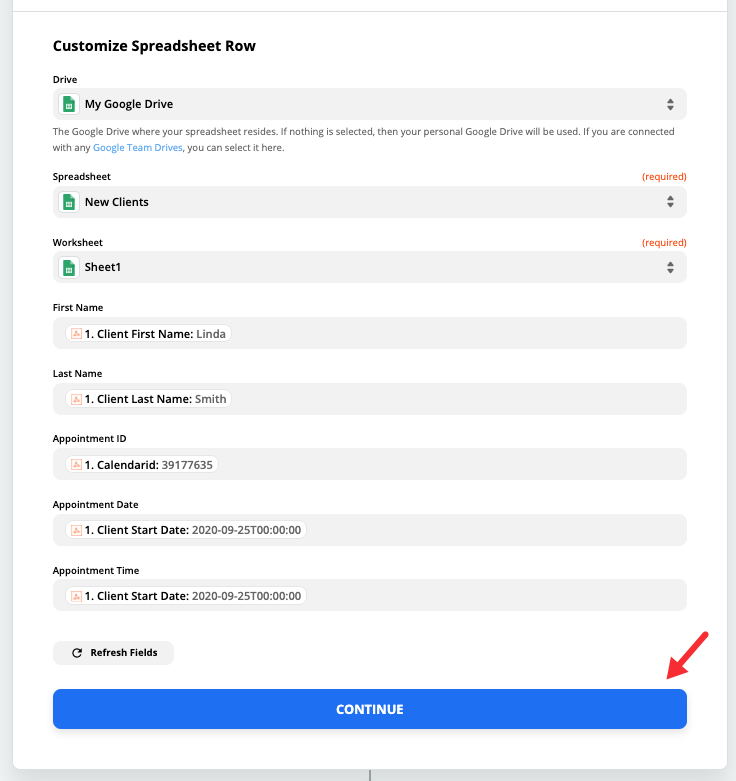
After the information is mapped in the spreadsheet columns, you'll need to click on the blue Continue button -
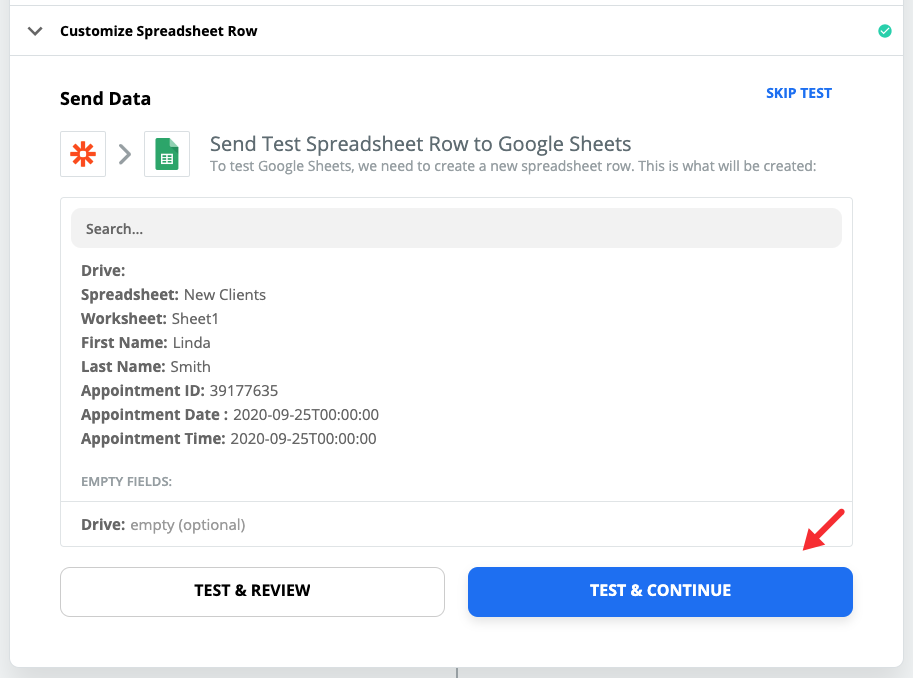
Zapier will display a summary of the zap we created - from here you'll need to confirm that the information is mapped correctly and then click on the blue Test & Continue button -
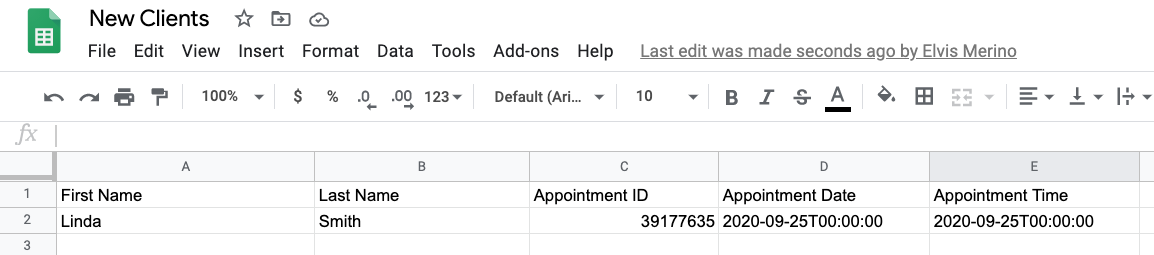
Locate the spreadsheet in the Google Drive and notice that the information we requested is populated in the columns we selected -
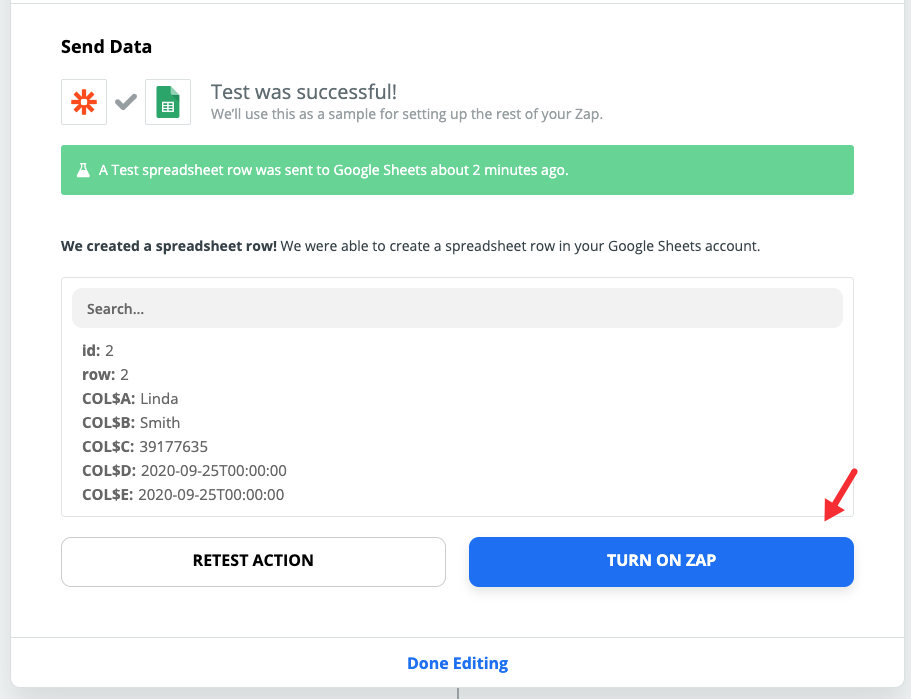
Finally, go back to Zapier and click on the blue Turn on Zap button. This will make it so that when a new client books an appointment, the information we requested will get populated in the columns we mapped -
This is a brief example of how you can send data to a 3rd party app using Zapier. Depending on your Zapier subscription, you will be able to send your appointment information to different applications.