Appointments will automatically be added to your schedule when clients book through your scheduler, either via your booking site or the embedded version of the scheduler on your website. The staff member associated with the appointment will receive an email notification confirming that appointment, and you can view and manage the appointment in TimeTap through the Calendar or List views.
Clients will navigate your scheduler to select a Location, Staff, Service/Class/Course, and the date and time for their appointment. On the final page, they’ll enter their details, creating a client profile in your account based on the configured detail fields. This profile will include all their appointments and related information.
Here’s an preview of how clients create their own appointments through the scheduler:
If clients return to the scheduler and book a second appointment using the same First Name, Last Name, and Email, it will be linked to the same client profile as their initial appointment.
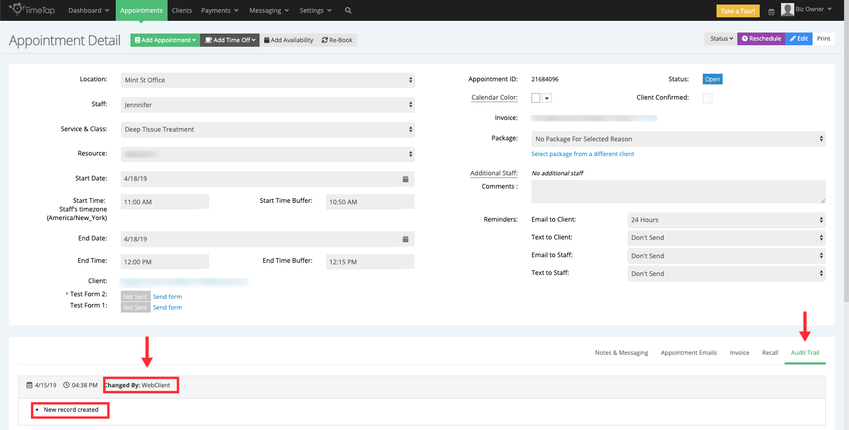
To check if an appointment was created by the client, view the appointment’s details in the Back Office and refer to the Audit Trail tab. If the "New Record created" entry shows "WebClient," the appointment was made through your scheduler.
After a client books an appointment, you can manage it just like any One-Time or Recurring appointments you create in the Backoffice. This includes the ability to:
- Change the appointment status
- Edit the appointment time, date, or service
- Reschedule the appointment