This guide covers adding appointments for services that occur on a recurring basis. The process is similar to adding repeating appointments for classes, with a few key differences.
To add a repeating appointment series for a service, you'll need to do the following -
-
Add Appointment > Add Repeating Appointments
- Start by clicking on the green Add Appointment button and selecting Add Repeating Appointments from the dropdown menu that appears -
- Start by clicking on the green Add Appointment button and selecting Add Repeating Appointments from the dropdown menu that appears -
-
Enter Appointment Information
- On the next page you'll need to fill in the main details (Location, Staff, Reason, Client) for the appointment -
- On the next page you'll need to fill in the main details (Location, Staff, Reason, Client) for the appointment -
-
Set the Date Range and Frequency
- Select the day for the series to start on.
- Choose whether this series ends on a specific day or repeats on an ongoing basis.
- For appointments with no end date, TimeTap schedules them as far out as your Advanced Appointment setting allows, automatically adding more appointments as time goes on.
- Set the frequency (weekly or monthly) and select the day(s) of the week (e.g., Monday and Wednesday).
- The start time defaults to 8:00 AM but can be changed by typing over it or using the arrows.
- The end time adjusts automatically based on the duration of the selected service but can be manually overridden as well.
-
Review and Adjust Appointments
- The Summary of Appointments table will display all appointment dates in the series based on the set date range and frequency.
- For services, you can select or deselect specific dates in the "Summary of appointments" field. For example, deselecting the appointment on October 5 will exclude it from the series.
-
Any appointment times that are unavailable or already booked will display a red x symbol and will be deselected from the list (as shown below). You can select any upcoming times that are not included due to already being booked if you wish to manually override that availability.
If you later make changes to an individual appointment in that series and wish to apply changes to all following appointments, any future appointments in that series that were previously deselected when being created may be re-added.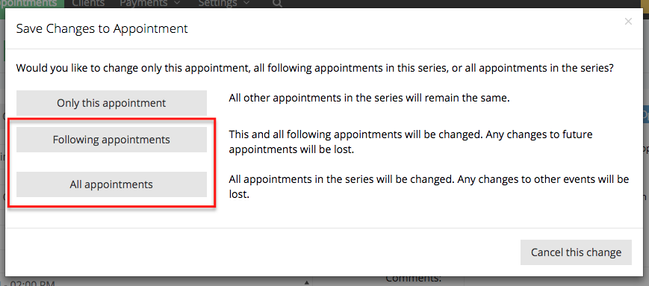
-
Save the Appointment
- Click on the green Save Repeating Appointments button.
- You’ll be prompted to send an email notification about these new appointments. By default, email checkboxes are unselected for new users, but TimeTap remembers previous selections for returning users so they will stay enabled after you check the boxes.
-
Click on the green Save Repeating Appointments button to finish creating the appointment series -
Once you've saved the appointment, you will be taken to the repeating appointment details page where you can see all the individual appointments in the series under the Related Appointments tab -
You're also able to edit and manage the repeating appointment series from this page.