Each staff member on your account has their own staff profile, which serves as the central place for managing their personal details, availability, permissions and appointment activity. From this profile, you can control how a staff member appears to clients, define when and what they are bookable for and view both upcoming and past appointments. While all staff have a profile, the available profile sections and options will vary slightly depending on whether the staff member is set to accept appointments.
This help doc covers -
- How to Find your Staff Profile
- Components of your Staff Profile
- How to Edit your Staff Profile
- Staff Custom Booking Site & Embed Code
- Your Upcoming & Past Appointments
This will take you to your specific staff profile. Among other things, you'll be able to see which services (and classes) you offer appointments for -
From your staff profile you can -
- Edit your staff details
- Provide specific instructions per staff's request
- Add availability for taking appointments
- Sync an external calendar with your TimeTap account
- View your upcoming and past appointments
If you are an office assistant or have a similar role at a business and do not accept appointments, your staff profile will look like this and you will be able to see to which location's calendar you have access to if you have a security role of User or Location Super User -
You'll notice that in the profile for staff who do not accept appointments they be missing several of the fields that are directly related to appointments nor will they have the ability to add availability since availability is only useful for staff that do accept appointments.
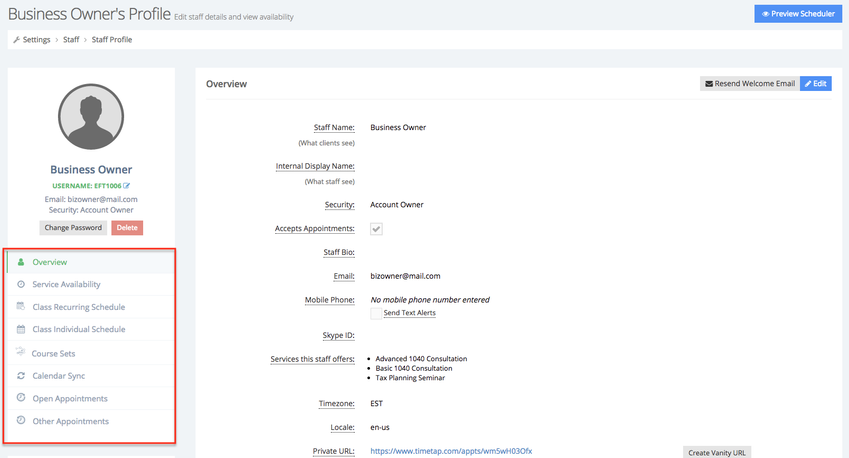
On the left side of your staff profile you'll see 9 tabs - Overview, Service Availability, Class Recurring Schedule, Class Individual Schedule, Course Sets, Calendar Sync, Open Appointments, Other Appointments and Audit Trail.
On the Overview tab, you'll see your staff's name, security role, email address, a list of locations where they offer services and a number of other details about the staff member that can be set. At the bottom of this page, you will find an Email Settings section that includes an Email Signature field that will get added to all email templates that get sent out about appointments that the staff is involved with.
On the Service Availability tab, you'll see a list of dates, locations, days of the week and times that you are set to offer service availability at. For more about how to add service availability, go to this page in our documentation.
On the Class Recurring Schedule tab, you'll see a list of all the recurring class schedules that have been added for that staff. You can find more about how to view & manage your staff's class schedule on this page of our documentation.
On the Class Individual Schedule tab, you'll see a list of all the class sessions that have added for that staff, whether they are recurring or only occur once.
On the Course Sets tab, you'll see a list of all the scheduled course sets that the staff is set to lead. For more about courses and how they differ from class sessions, you'll need to look here in our documentation
On the Calendar Sync tab, you'll be able to sync your TimeTap account with an external calendar. This will allow you to be able to see all events that have been created on both calendars on either 1 of them, and gets described in more detail here in our documentation.
On the Open Appointments tab, you'll see a list of all the appointments the staff is involved with that have a status of Open. These generally are appointments that have been booked with a client and are scheduled in the future.
On the Other Appointments tab, you'll see any appointments the staff is involved with that have a status of Completed, Cancelled, or No Show.
On the Audit Trail tab, you'll see a list of any changes made by or to the staff profile, with a timestamp included.
As with every page in the Settings menu, there is also a blue Preview Scheduler button on the upper right. You can click on this to be directed to your Client Scheduler so that you can test booking appointments as a client to make sure that everything looks proper.
Once you click on that button, you'll be able to change the Staff Name, Security role, Accepts Appointments, the Staff Bio, the Email, their Mobile Phone number as well as set a number of fields that will help the staff host virtual appointments. You can also modify the services the staff offers, set their timezone and locale, upload a staff photo and set their default address that gets used with our Travel Time Calculator feature -
Changing the name displayed on your staff profile will change the how the name displays in all places within the booking process where clients see the staff name.
To make any changes to your staff signature, add staff-specific email instructions or select which email templates to exclude for this particular staff member, you'll need to scroll down to the Email Settings section and click on the blue Edit button -
Your staff name, business name, email address and mobile phone number get included in your staff signature by default. You can populate additional data to your staff signature by using our email tags. Once you have finished changing your profile details, click on the green Save button and the changes you made will get saved.
Provide Instructions per Staff Request
The Email Instructions field under the Email Settings section is an optional field that can be used to customize your email templates on a per staff basis. If each of your staff members have different policies for appointments they host, for example, you can enter those policies into this field and then add them to any of your email templates using the tag %STAFF_INSTRUCTIONS% -
We also offer an Additional Email Instructions field where you can insert any special instructions that didn't fit in the first field - the contents of this field can be populated using the %STAFF_INSTRUCTIONS2% email tag.
Changing your Password and Username
To change the password you use to log in to your account, you can go to your staff profile and click on the Change Password button shown with the red arrow below -
Once you click on that button, a window will pop up where you will need to enter your current password, enter a new password and confirm that new password before clicking on the green Save New Password button -
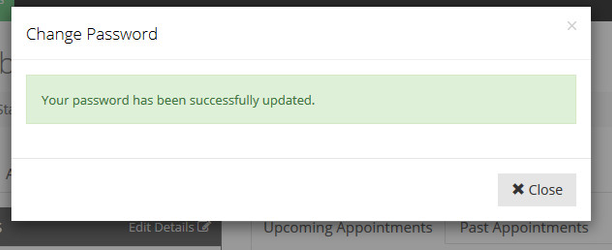
Once you click on Save New Password you will see a brief confirmation message. You'll then start using the new password you created the next time you log in to the application -
Custom Booking Site & iFrame Embed Code
Each staff member has the ability to create a Custom Booking Site URL for their profile that comes with an embed code that can be used to direct clients to book specifically with them.
These links are useful if you want to highlight an individual staff member on your website or send clients directly to view that person’s availability without showing other staff on the account
To find a staff member’s custom booking site URL, go to Settings > Staff > View beside that staff member, and scroll to the Custom Booking Site on their profile -
On your website, you could direct clients to the custom booking site URL for one of your staff members so that they are specifically booking with them. If you click on this link within Backoffice, you will be taken to the web scheduler where clients will be able to schedule an appointment specifically with this staff member. Once the clients have chosen a service, time, and entered in their information, they can click on Save and their appointment will get booked.
The embed code can be copied from the same section and added to your website if you want to display their scheduler directly on a page. By clicking on the Copy to Clipboard button, you will copy the full iFrame code to your clipboard for that specific booking link and can then paste it within the coding on a webpage.
Using that embed code enables your staff members' clients to book directly with them through their web scheduler while only showing information for the classes or services they offer.
Upcoming & Past Appointments
The appointments that will display on your Open Appointments page are all of your appointments in Open, Confirmed and Checked In status. If you would like to see any of your past appointments, click on Other Appointments -
Once on the Other Appointments tab, you will be able to see any appointments that have a status of Completed, No Show or Cancelled.