Invoices in TimeTap are categorized based on one of three statuses:
Open Invoices
All invoices start out in open status. Once their balance amount reaches 0, the invoices will move into Closed status. You can also manually void an invoice from the invoice's detail page.
As a status, Open generally means that you still need and are expecting payment for an invoice. Any invoices in your Open Invoice list should be there because eventually a client will pay on them and they'll get closed out.
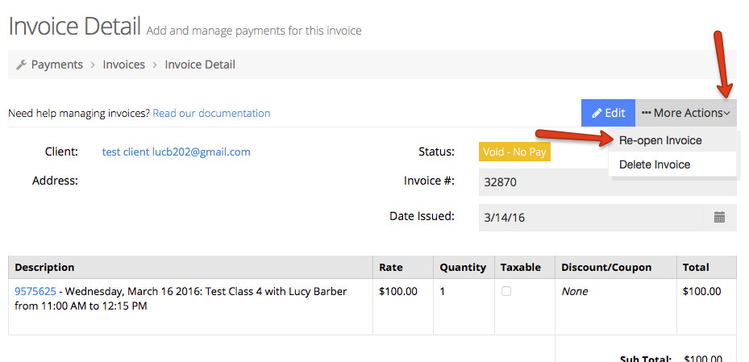
In terms of editing an invoice, you'll need the invoice to be in Open status before you can make changes to it. You can reopen Closed and Voided invoices and make changes to them if you need to after they've been marked as closed or void.
Open Invoices have 2 sub-statuses:
- No Payment - this is the status if no payments have been entered on the invoice yet
- Partial Payment - this is the status if some payments have been made on the invoice, but the balance has not reached 0
You can close Open Invoices by using the buttons at the bottom of your Open Invoice Detail page to Charge with your Payment Portal (if you have one setup) or Record Payments that you took in your office or through a different method than TimeTap's payment portals:
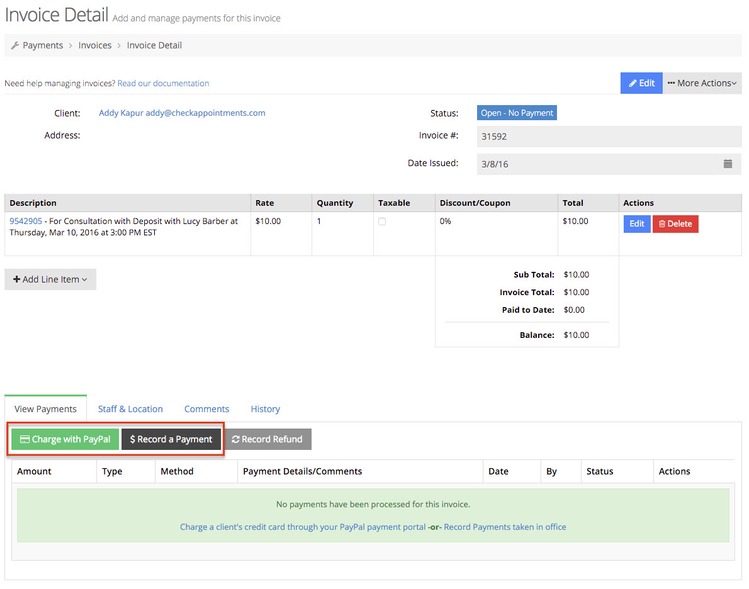
Once a payment is recorded that brings the invoice balance down to $0, the invoice will be marked as Closed.
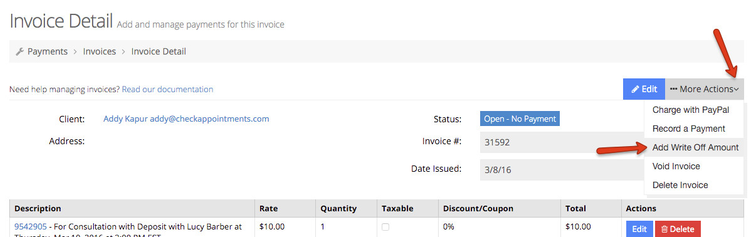
You can also use the More Actions menu to add a write off amount. This is useful if you don't expect that the full balance on the invoice will get paid and want to mark the rest of it as a write off:
Closed Invoices
Closed invoices are any invoices where the balance has reached $0. This includes any invoices where the payment amounts that were charged or recorded totaled up to the invoice total or any invoices where a write off amount was added to bring the balance on the invoice down to $0.
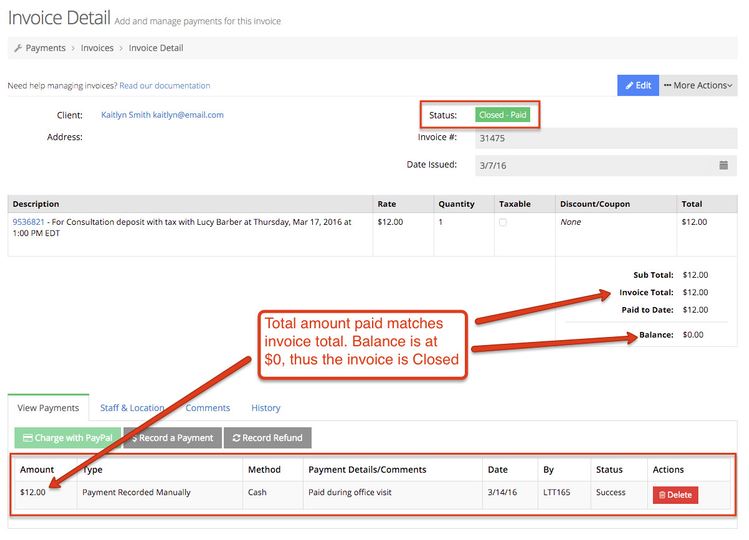
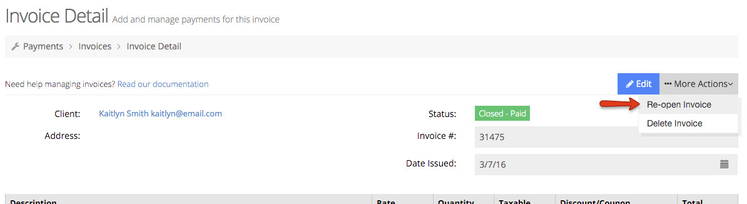
When an invoice is in closed status, you cannot enter any more payments or make changes to any line items. In order to do this, you'd have to reopen the invoice using the More Actions menu in the top right:
Void Invoices
An invoice can either be marked as void Manually using the More Actions dropdown menu from an open invoice's view or it may be marked as Void - No Pay automatically.
The Void - No Pay status happens only when you:
- Have a payment portal set up on your account
- Have payment marked as Required
- A client has gone through your scheduler to book an appointment for a service or class that has a price or deposit amount listed on it. The client does not submit payment on the invoice within the allotted time frame, which is 90 minutes. At that point, we cancel the appointment due to non payment and void the invoice marking it as "No Pay".
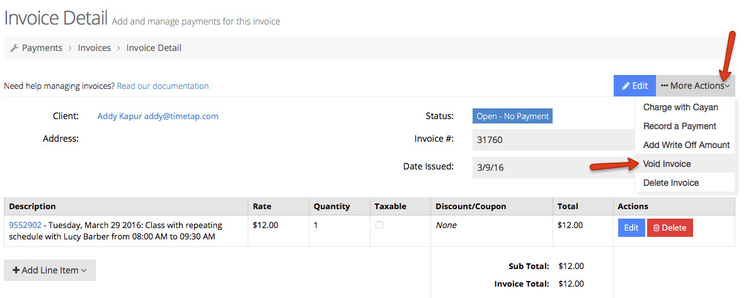
You can also manually void an invoice by going to an open invoice's detail page, clicking the More Actions menu and selecting to "Void Invoice":
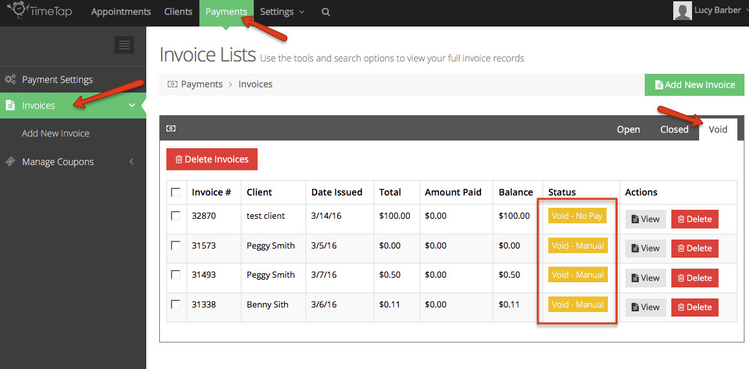
When you're looking at your list of Void invoices, you'll be able to tell the difference between invoices that were voided due to not paying for their appointment upon booking and invoices that you voided in the back office by the sub-status that displays:
Once an invoice is in "Void" status, you cannot make changes to the line items that are on the invoice or enter any new payments. To do that, you need to use the option under the More Actions menu on the invoice detail screen to "Re-Open" the invoice. This will give you all the editing controls on the invoice screen: