The Time Panel Settings effect how your appointment time slots display on the Time panel no matter if clients are booking a service based appointment or a seat in a class. Through the Time Panel Settings window, you can adjust many elements in the Time Panel such as:
- The title of the panel
- The Time format (if you'd prefer 1:00pm to show as 13:00)
- Whether client can see the time when their appointment ends
- Whether clients can adjust their timezone (or whether the appointment times just display in the business's time zone setting)
- Whether appointments are assigned to staff through round robin logic
- What error message appears when there's no availability for services and no seats left for any class sessions
- The help text that appears at the top of the panel & many more.
You will make each of these changes by going to Settings → Time and clicking on the "Time Panel Settings" button:
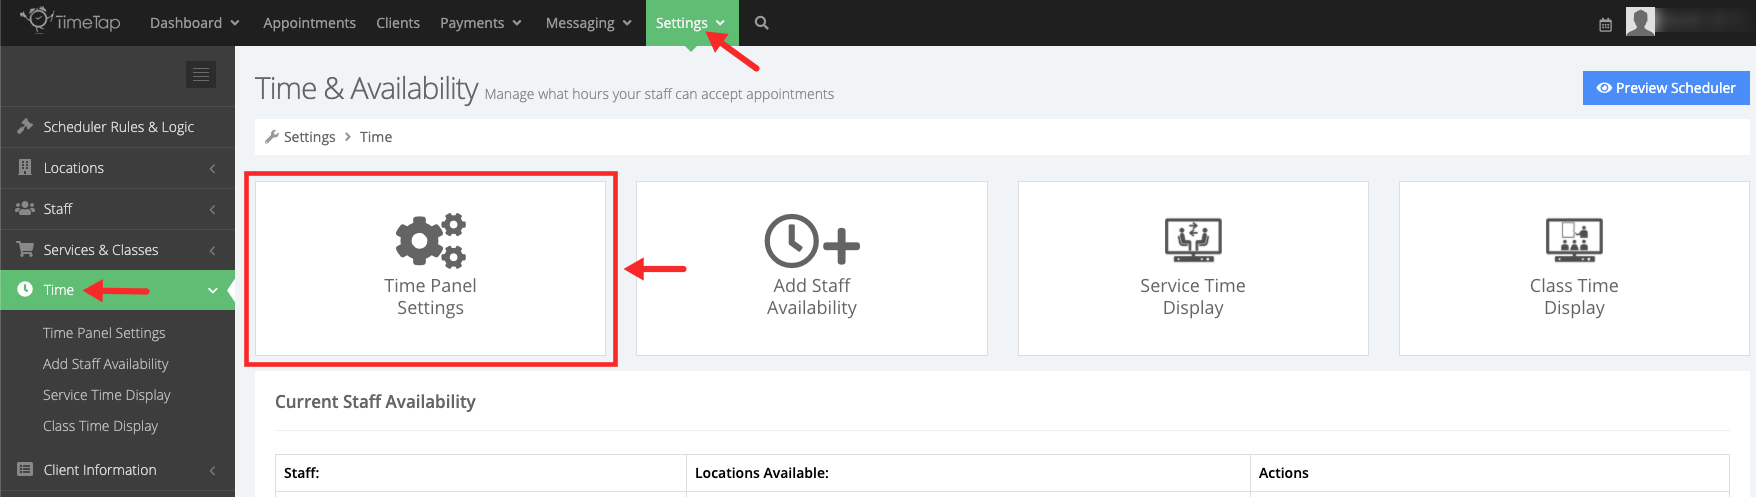
This will bring up your Time Panel Settings window:
- Panel Title: This is what displays in the header bar of the screen on the scheduler where clients are picking the date and time of their appointment.
- Time Format (24 Hour Format): if you would prefer to display the appointment times in military format, you can turn on the 24 Hour Time Format option which would essentially make 1:00pm display as 13:00.
- Show Timezone Next to Times: If this is checked, then a timezone indicator will appear to the right of each time listed in the time panel of the scheduling flow.
- Show Appointment End Time: Select this option if you want to show both, the start time and end time of the appointment to your clients.
- Allow Multiple Appointment Booking: Allow clients to book multiple appointments of the same service or class type through the scheduler.
- Auto Select Time (On Single Booking): This determines whether the time panel on the scheduling flow loads with a time already selected or if it requires the client to manually select which time. This only applies to single appointment bookings, not multiple.
- Round Robin: This setting ensures that round robin logic is applied in any scenario where multiple staff are available for an appointment time. This also overrides the "Book Staff in Order" setting configured on the Staff Panel Settings.
- Time Lock for Appointment Time Selection: This determines how long a client's time selection on the scheduler is held before it is released for other clients to claim. This gives the client time to fill out the
booking fields so another client can't claim it before them. - Booking Summary: Change the text that displays underneath the time panel title bar as a summary of the client's selections in the scheduler.
- Rescheduling Summary: Change the text that displays underneath the time panel title bar when a client is rescheduling their appointment.
- Client Timezones: by default, TimeTap will auto detect what timezone your client is in and display appointment times to your client in that timezone. It will also assign that time zone to your client in the client's profile. You have the ability here to change this default setting so clients are either (a) not able to change timezones and thus all appointment times display in your business's timezone setting (from point #3 above) and all clients would be assigned to that timezone or (b) not display the timezone at all
- Timezone Dropdown Label: Change the label that shows above the list of timezones for clients to choose from, if you choose the display the client's timezone or change it.
- Select Date Label: Change the label that appears above the calendar to prompt clients to choose a date for their appointment.
- Select Course Set Label: If you offer courses you can change the label that displays above the list of course sets that show in your scheduler to prompt clients to select a set.
- No appointments error message: This is the message that will appear when no more appointment times are available for your clients to book with you. By default it reads "All appointment times are currently reserved. Please check back again later." but if you are a TimeTap Professional user you can edit this message to include whatever language you would like for it to.
- No appointments in selected month error message: Change the error message that appears if a client scrolls to a month that does not have any availability.
- Header Text: Whatever text you enter here will show up at the top of the "Time" Panel in your scheduling flow. This can be used to explain more around the times you're available or to offer clients another option for getting in touch with you if they don't see a time they like for their appointment.
Once you've made all the changes you wanted to make to your Time Panel Settings, you can press "Save Changes" at the bottom and check out how those changes may look on your Time page of your scheduler.